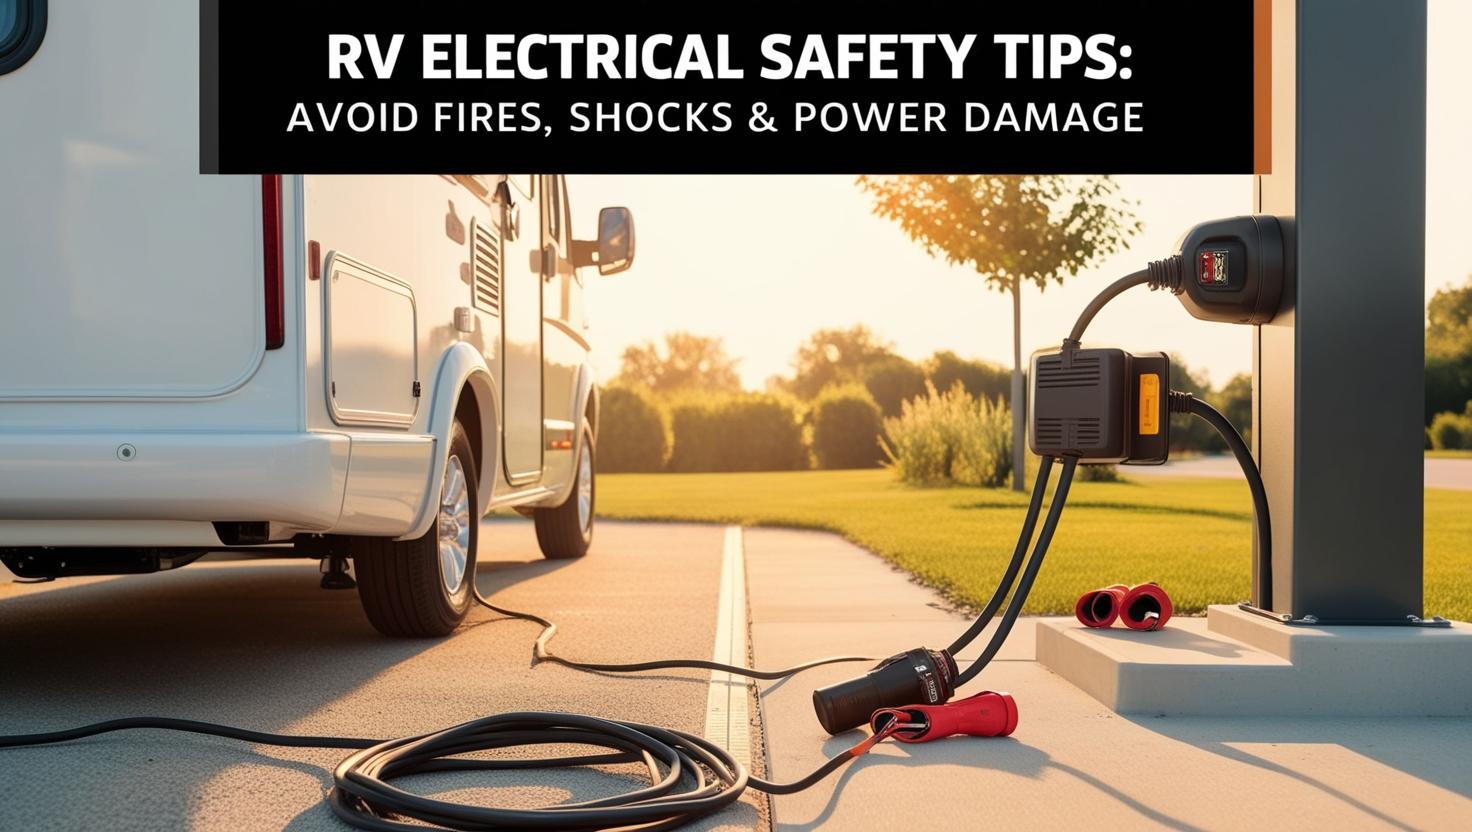
RV Electrical Safety Tips: Avoiding Fires, Shocks & Power Damage
RV life offers freedom and adventure, but it also comes with serious electrical safety responsibilities. Whether you’re a full-time RVer plugging into new campgrounds every week, a DIY enthusiast upgrading your rig’s wiring, a first-time RV owner learning the ropes, or a family on vacation, understanding RV electrical safety is essential to protect your loved ones and your home-on-wheels.
In this guide, we’ll explain common electrical hazards (from miswired pedestals to overloaded circuits) and share friendly, actionable tips to prevent shocks, fires, and costly power damage 💥.
You’ll also find product recommendations – like surge protectors and voltage testers – with [Buy Now] links, plus a handy checklist at the end ✅.
Let’s get started on making your RVing shockingly safe (in a good way)! 🔌
⚡ Safe RV Power Hookups for Campgrounds and Homes
One of the most critical moments for RV electrical safety is when hooking up to shore power at a campground or home. A miswired or faulty power pedestal can deliver the wrong voltage or lack proper grounding, creating shock hazards or frying your RV’s electronics.
⚠️ Always assume an outlet may be wired incorrectly until you test it — never just trust the campground’s word. Here are some essential “safe RV power hookups” practices to follow every time:
1. Turn Off the Pedestal Breaker First
Before plugging in, locate the campground pedestal’s breaker and switch it off. This ensures there’s no live power when you connect, preventing arcing that could damage your plug or shock you. After your RV cord or surge protector is securely plugged in, turn the breaker back on. 🔌
2. Inspect and Test the Outlet
Do a quick visual check — burn marks, melted plastic, or wiggly parts are warning signs. If everything looks good, test the outlet using a plug-in outlet tester or multimeter before plugging in. For a 120V/30A outlet, you should measure around 114–126 volts between hot and neutral, and 0 volts between neutral and ground. ⚡ Any strange readings (like voltage between neutral and ground) mean the pedestal is unsafe to use.
3. Use a Quality RV Surge Protector or EMS
Always connect a surge protector or Electrical Management System (EMS) between your RV and the pedestal. A good EMS will automatically scan the power source for wiring faults, low/high voltage, open grounds or neutrals, and even dangerously miswired outlets (some pedestals mistakenly deliver 240V on a 120V plug!).
It acts like a power watchdog — cutting off bad power instantly to protect your rig from fire or costly damage. (Want to learn more? See our RV Surge Protectors 101 and product guide at 5 Best RV Surge Protectors in 2025.)
4. Secure All Connections
Push connectors in fully. If your RV uses a twist-lock plug, twist it securely and tighten the locking ring. Loose plugs can cause arcing, heat build-up, or even hot-skin electrification (where the RV frame becomes electrically charged). Always check both ends of detachable cords and adapters — use an outlet lock or strain-relief bracket if needed.
5. Use the Right Extension Cords (If Needed)
If the pedestal is far from your RV, use a heavy-duty RV-rated extension cord of the correct gauge (e.g., 30A cord for 30A rigs). Never use lightweight household cords. A thin 15A cord can overheat and cause voltage drop, melting the cord or electrifying your RV’s skin.
💡 Pro Tip: If your standard shore cable won’t reach, invest in a proper 30A or 50A RV extension cord that’s rated for your rig’s amperage – [Buy Now].
✅ By following these hookup tips, you’ll greatly reduce the risk of shocks, fires, or equipment damage. Every connection point — from the pedestal to your RV’s breaker panel — should be treated with care and respect.
Next up, let’s talk about one of the most serious (and invisible) electrical dangers: the dreaded RV “hot skin” problem.
⚡ RV Shock Hazard Prevention: Avoiding “Hot Skin” and Electrocution
Electrical shock is a silent danger that RVers must guard against. A common and potentially deadly scenario is the “RV hot skin” condition, where the entire metal body of the RV becomes electrified. This usually happens due to a fault like an open ground or miswired neutral on the shore power connection. Every year, hot-skin incidents injure or even kill unsuspecting RVers – people may get a tingle or shock when touching the door handle or steps, especially if standing on the ground. We want “RV shock hazard prevention” to be top of mind, so here’s how to protect yourself and your family:
🔎 Understand What Causes Hot Skin
Hot skin (also called stray voltage) means the RV’s metal frame is energized. This can be caused by a reverse-polarity wiring at the pedestal, a missing ground, a broken neutral, or other improper wiring. Even a damaged shore cord or a loose connection can divert current to the RV chassis. If there’s no proper ground path, the RV itself becomes the easiest path for electricity. Touching it while standing on earth means you complete the circuit – resulting in a shock. Never assume “a small shock” is okay – any tingle from your RV is a sign of a dangerous problem that must be fixed before anyone touches the RV again.
🧰 Test for Hot Skin at Every Setup
A simple tool can literally be a lifesaver here: the Non-Contact Voltage Tester. This is a pen-shaped tester that lights up and chirps if it senses voltage on a surface. Each time you plug into a new power source, before you let family members wander in and out, test the RV’s exterior. Turn on your non-contact tester and hold it against a metal part of the RV (door frame, hitch, or skin). If the tester lights up or beeps, do not touch the RV! Immediately shut off the power and disconnect – you have a hot-skin condition. Only reconnect once the cause is identified and fixed (for instance, a campground wiring fault). This 2-second test can prevent a tragedy. As one expert puts it, never accept feeling a shock — even a small one; it means something is wrong that could turn lethal.
⚙️ Use Proper Grounding and GFCIs
Your RV’s electrical system is designed with safety grounds – that round third prong on plugs and the RV’s bonding to chassis – all to route any stray voltage to earth instead of through you. Never defeat or remove ground pins on plugs or adapters! Using a “cheater” adapter without a ground is extremely dangerous: “Using plugs and adapters without ground pins gets people killed every year.”
Also, make sure your RV’s GFCI outlets (the ones in the kitchen, bath, or exterior with test/reset buttons) are functional – test them monthly. GFCIs can detect a ground-fault (like electricity going through a person) and cut power in as little as 1/40th of a second, potentially saving a life. If you’re doing any DIY wiring, always include GFCI protection in wet areas. And if you frequently camp at older sites with only 2-prong outlets (no ground), use a proper GFCI adapter or upgrade the outlet – don’t just plug in ungrounded.
🌧️ Stay Dry and Cautious
This may sound obvious, but never handle electrical cords or touch the pedestal with wet hands or while standing in water. If it’s raining during hookup, wear insulated electrical gloves [Buy Now] and rubber-soled shoes for an extra layer of protection.
Teach children not to touch the RV’s metal parts or cords while someone is connecting or if there’s any electrical issue. Families should also consider adding outlet covers on indoor outlets (to prevent curious kids from inserting objects) and ensure no frayed wires are within reach. For pets, keep them from chewing on cords and consider a quick hot-skin test on metal parts of their tie-outs or crates if they’re touching the RV – pets can sense shocks too!
🛡️ EMS to the Rescue (Again)
As mentioned earlier, a quality EMS surge protector also helps with shock prevention. It continuously monitors for wiring problems. If the pedestal has an open ground or neutral, or a dangerous voltage on the ground, a good EMS simply won’t allow power to flow.
It’s your first line of defense against a miswired power source that could cause a hot-skin. In fact, using an EMS is cited as “the best defense against RV hot skin” because it will instantly shut off power if it detects that stray voltage condition.
✅ In Short
Preventing shock hazards comes down to maintaining proper grounding and being vigilant. The goal is that the only sparks flying on your RV trips are from the campfire, not from your RV’s metal frame! 🔥
Next, we’ll look at another big risk area: electrical fires and overloading.
🔥 How to Avoid RV Electrical Fires and Overloads
Electrical fires can reduce an RV to a blackened shell in minutes. Unlike a house, an RV is compact and filled with flammable materials – meaning an electrical spark can be devastating. Many RV fires start with the electrical system. In fact, campground experts note that electrical hazards are among the most common reasons for RV fires, often caused by overloaded circuits, loose/faulty wiring, or improper use of extension cords.
So, “how to avoid RV electrical fires”? Focus on preventing overloads, ensuring solid connections, and performing regular maintenance:
📏 Know Your RV’s Limits
Every RVer should know the basic electrical capacity of their rig. A 30-amp RV can handle a maximum of ~3,600 watts, while a 50-amp RV can handle up to ~12,000 watts (split across two “legs” of 120V). If you try to run the microwave (1200W), plus a hair dryer (1500W), plus the water heater (1200W) all at once on a 30A system, you’ll exceed the limit and likely trip a breaker.
Overloading circuits not only trips breakers but can also cause wires or connectors to overheat if the breaker malfunctions. To be safe, avoid running too many high-wattage appliances at the same time. Pay attention to signs of strain – like lights dimming significantly when an AC compressor kicks on (indicating voltage drop) or a circuit breaker that keeps tripping.
Managing your power usage is especially important for families who might have multiple devices charging and appliances running – try to stagger heavy appliance use (e.g., finish making toast before turning on the hair dryer).
⚠️ Respect the Circuit Breakers and Fuses
If a breaker does trip, don’t just reset it repeatedly without investigating why. A continually tripping breaker is telling you something’s wrong – either you’re drawing too much current or there’s a short/fault. Constantly forcing it back on can overheat the breaker and the wiring.
Instead, reduce the load on that circuit (unplug some devices) or have an electrician check for faults if it trips at low loads. Never bypass a fuse or put in a higher-amp fuse than specified – that’s a recipe for overheated wires and fire. For any replaced fuses, always use the correct amperage. Breakers and fuses are your safety valves; heed their warnings.
🔥 Prevent “High Resistance” Heating
A major cause of electrical fires in RVs is not just raw overload, but loose or corroded connections creating high resistance points. For example, if a shore power plug isn’t making a tight connection to the pedestal receptacle, the resistance at that junction goes up, and it can start to heat up significantly under load.
This is why you sometimes see a 30 amp plug that has melted or charred without any breaker ever tripping. The plug and socket became a little furnace due to a weak contact. Over time, campground outlets wear out and grip plugs less firmly, exacerbating this issue.
Always check your power cord plug for signs of heat after you’ve been drawing heavy loads (like running the A/C). It might feel slightly warm, but it should never be too hot to touch or showing scorch marks. If it is, cut power and let it cool. You may need to replace your plug or ask the campground to service their outlet.
Also, periodically inspect your RV’s main electrical connections (with power off): loose screw terminals in the breaker panel or converter can cause overheating over time. Travel vibrations can loosen connections and potentially start fires if not re-tightened. Keeping all connections tight and corrosion-free is key to preventing hidden hot spots.
🚫 Use Proper Cords and Avoid Daisy Chains
We mentioned extension cords earlier but it bears repeating: don’t daisy-chain multiple adapters or cords for your RV’s main supply. Each connection is a potential weak link (and heat point). Also, never plug a high-load device like a space heater into a cheap, thin extension cord or power strip – those can overheat and ignite.
If you need extra outlets, use a heavy-duty power strip with a built-in breaker, and keep the load well below its rating. Uncoil any cord fully when in use — coiled cords can trap heat. And if you ever find an outlet that sparks or arcs when you plug in, stop using it and get it fixed immediately. That spark means a poor contact.
Too many extension cords or splitters in use is a red flag – simplify your setup and use the correct length and gauge of cord for the job to reduce fire risk.
🔧 Be Mindful of Appliance Maintenance
Large appliances in your RV — like the air conditioner, fridge, electric water heater, or washer/dryer — can also be fire sources if they malfunction. Make sure your A/C is serviced (clean filters, no frayed wires), and if it ever smells burnt, turn it off and investigate.
A struggling air conditioner drawing low voltage will run hotter and could overheat its wiring or start a fire. Low voltage situations (below ~105 volts) are especially hard on AC motors — they draw more current and can overheat the compressor windings.
If your EMS cuts power for low voltage, be glad — it’s protecting you from this hazard. Similarly, regularly check the wiring behind your fridge and other appliances for any loose or charred connections.
Smoke detectors (with fresh batteries) in your RV are a must-have to catch any electrical fire early, and keep a fire extinguisher on board (we cover essential fire safety gear in Top RV Fire Safety Gear).
✅ Final Reminder
By managing your electrical load and maintaining your equipment, you can dramatically reduce the risk of an electrical fire. Most fires give off early warning signs — flickering lights, burning plastic smells, odd sounds — don’t ignore those.
Next, let’s address those who like to tinker: some extra wiring safety tips for the DIYers among us.
🔧 RV Wiring Safety Tips for DIYers and Upgraders
DIY projects and upgrades are common in the RV community – from adding solar panels to changing out an inverter or installing new outlets. While DIY can be rewarding, improper electrical work is a major safety hazard. If you’re not careful, you might create a shock or fire risk that endangers everyone.
So, here are some crucial RV wiring safety tips for the DIY-inclined (and really for any RV owner doing maintenance):
📚 Learn Your RV’s Electrical System
Unlike a house, an RV has both a 120V AC system and a 12V DC system. They serve different devices but sometimes share pathways (e.g., the converter charger bridging them). Before doing any electrical task, turn off shore power and generators and disconnect the battery (for DC work). This ensures you don’t accidentally get zapped from either side.
Understand the color coding: typically black (or sometimes red) is hot in RV AC wiring, white is neutral, green or bare is ground – but DC wiring may use red for +12V and black for ground, which can confuse things. When in doubt, test wires with a meter before assuming their role.
🧰 Use Proper Components and Wiring Practices
RVs vibrate and jostle down the road, so wiring that might be “okay” in a stationary house might not hold up in an RV. Use stranded wire of the proper gauge for flexibility (most RV wire is stranded, not solid core). Secure wires with clamps or ties so they don’t chafe on sharp edges.
When adding or replacing outlets or fixtures, use devices rated for RV or marine use if possible (they tolerate vibration better). Always crimp or screw connections tightly – a loose wire nut in an RV can wiggle loose and arc.
If you’re splicing, use quality connectors (like crimp butt connectors with heat shrink) rather than just twisting wires together with tape. Never leave any connection open or exposed – use junction boxes for any new wiring joints to contain sparks if a wire does come loose.
📏 Match the Wire Gauge to the Amps
This is a fundamental rule – never undersize wires or breakers. If a circuit is 15 amps, use at least 14 AWG copper; 20 amps needs 12 AWG, 30 amps needs 10 AWG, and so on (or larger if long runs).
Overloading a small wire will heat the insulation to the point of melting – and then it can short and ignite. If you’re adding a new 120V circuit for, say, a second air conditioner, make sure to run the appropriate gauge wire and install the correct breaker for it.
The same goes for DC wiring: high-current items (like an inverter or leveling jack motor) need thick cables with proper fuse protection. It’s worth consulting an RV electrician or reference charts if unsure.
Never replace a blown fuse with a higher amp one “just to stop it blowing” – that’s a shortcut to an electrical fire.
⚡ Beware of 240V vs 120V Confusion
A classic DIY mistake is mis-wiring the RV’s shore power inlet or a home RV outlet. For example, the standard RV 30-amp plug (TT-30) looks a bit like a household 240V dryer plug – and indeed every year someone mistakenly wires a TT-30 outlet to 240 volts instead of 120.
Plugging your RV into that will immediately damage many appliances (and could start fires in wiring). If you’re installing a 30A outlet at home for your RV, double-check the wiring: it must be 120V (hot-neutral-ground), not 240V split-phase.
Likewise, a 50-amp RV uses a 240V split configuration (two 120V legs out of phase), which is different from some welding or generator outlets. When adapting plugs, use only known-safe adapters – don’t jury-rig a custom cable unless you really know what you’re doing. A small error can send the wrong voltage to your rig.
If your EMS or surge protector ever reports “Open Neutral” or “Reverse Polarity” when you hook up somewhere, do not proceed – that could indicate a serious wiring issue (like a floating neutral that can put 240V on appliances). Get a professional to fix the wiring.
🛡️ Add Safety Devices in DIY Installs
If you’re adding an inverter or generator to your system, incorporate safety components. For inverters, use the proper transfer switch or automatic transfer relay so that your inverter cannot backfeed into the shore power or generator input.
A transfer switch isolates two power sources so they never meet – preventing accidents. Similarly, any generator you install on your RV should go through a transfer switch so it doesn’t energize the shore power cord inadvertently.
Always fuse battery connections close to the battery when adding inverters or other large DC loads – a catastrophic short can dump hundreds of amps from a battery in seconds, heating wires to red-hot. Finally, if running wires through walls or near metal, add grommets or conduit to protect against rubbing.
📞 Know When to Get a Pro
There’s no shame in consulting a certified RV technician or electrician for critical tasks. If you’re not 100% confident in your work, have it inspected. Electricity is one area where a small mistake can have life-threatening consequences.
For example, if you’re unsure how to properly bond a new generator’s neutral or how to wire a sub-panel for an inverter feed, get expert help. It’s worth it.
And always comply with electrical codes (NEC Article 551 covers RVs) and manufacturer instructions. DIY can save money and be fun, but safety must come first.
By following these wiring best practices, DIYers can ensure their projects enhance their RV life safely rather than introduce new hazards. Double-check all your work, use the right parts, and don’t cut corners.
Next, let’s discuss using generators and other power sources safely, since that’s a common area of confusion and risk.
🔌 Safe Generator Use and Alternate Power Tips
When shore power isn’t available, many RVers turn to generators – portable or built-in – or even connect to a house’s power. However, using a generator or alternate source improperly can lead to electrocution or equipment damage.
We’ll go over “safe generator use” for RVs and how to avoid the notorious “backfeed” risks that can endanger utility workers and others.
🔁 Always Use a Transfer Switch or Proper Plug-In
If your RV has an onboard generator, it likely has an automatic transfer switch that switches power sources (shore vs. generator) when needed. Make sure this device is functioning – it prevents the generator from feeding power out through the shore cord (which could electrify a pedestal or line).
If you use a portable generator, the safest method is to plug your RV’s shore power cord directly into the generator’s outlet (using an appropriate adapter if needed). This way, the RV’s main breaker panel is the only thing being powered.
Do NOT attempt makeshift solutions like a “suicide cord” (male-to-male plug cord) to backfeed a house outlet from your RV or generator. Backfeeding is extremely dangerous – it can send power the wrong way down utility lines and electrocute line workers or neighbors.
If you need to power household circuits with a generator, invest in a proper transfer switch for the house. In summary: one end of any power cable should always be in a female receptacle – never two males! Keep generator connections straightforward and isolated.
🌍 Grounding and Bonding for Generators
Many small inverter generators (like Honda portables) have a “floating neutral,” which is typically fine for running RV appliances. However, some RV surge protectors/EMS units might sense this as an open ground and refuse to pass power.
The workaround many RVers use is a neutral-ground bonding plug – a simple plug that ties generator neutral to ground at the outlet – which fools the EMS into thinking it’s a bonded source. This is generally safe when the generator is a standalone source for your RV. Check your EMS manual; some have a generator mode.
Additionally, always follow the generator manufacturer’s grounding instructions. Some portables say to connect a grounding stake if used outside of a building. In most cases for RV use, if you plug the RV directly, the RV’s own ground system will suffice.
⚠️ But be aware of the issue so you’re not left scratching your head if your surge protector says “Open Ground” on generator – the bonding plug could solve it. (If all this sounds too technical, don’t worry – just know that if your generator isn’t powering the RV, your safety devices might be doing their job. Seek guidance rather than bypassing them.)
🔒 Operate Generators Safely
Beyond the electrical hookup, basic generator safety can’t be ignored. Run generators outdoors in a well-ventilated area, away from any RV windows or vents. The carbon monoxide exhaust is deadly – always use a CO detector in your RV when running a generator.
From an electrical perspective, keep the generator dry (don’t operate in rain unless it has weather protection) to avoid shorting and shocks. Use a quality generator extension cord [Buy Now] if needed – one that’s rated for the generator’s output (e.g., a 30A cord) – and keep it as short as practical.
As with shore power, turn off or unplug heavy RV loads before starting the generator. Let the generator warm up for a minute, then flip your RV main breaker on. Similarly, before shutting the generator off, turn off heavy appliances to avoid surges or voltage drops under load. This prolongs the life of your devices and the generator.
⚡ Avoiding Surges and Spikes
Generators can sometimes deliver uneven power. A sudden surge when the generator is revving or a voltage spike can occur if, for example, the generator runs out of fuel under load.
An EMS surge protector can help here too – many models will disconnect power if the frequency or voltage goes out of spec. Also, be cautious with inverter/chargers and solar setups: if you have a solar power system or inverter that feeds your RV outlets, ensure proper transfer switching.
You don’t want your inverter power backfeeding into the generator or vice versa. All power sources (shore, generator, inverter) should remain isolated unless specifically combined by a system designed to do so. Reputable RV electrical products manage this automatically when installed correctly.
🚫 Never Backfeed into the Grid
This bears repeating because it’s so dangerous. If you ever think, “Maybe I can power my house by plugging my RV into an outlet with a homemade adapter,” just don’t.
Backfeeding is deadly – it can energize utility lines and kill utility workers or anyone touching a supposedly “dead” line. It’s also illegal in many areas unless using a transfer switch.
Even on a smaller scale – like running an extension from your RV to power a fridge in a garage during a blackout – make sure that extension feeds the appliance directly, not an outlet in the wall. When in doubt, consult an electrician. Your RV’s generator is meant to power your RV (or specific isolated loads) only. Keep it that way for everyone’s safety.
✅ Summary
Using generators and alternate power can be safe and effective as long as you follow proper procedures. Many full-time RVers run generators or solar setups daily without issue because they stick to these best practices.
Now, let’s round up the must-have gear that can help you implement all these tips and keep your RV’s electrical system healthy.
🔌 Must-Have Electrical Safety Gear for Your RV
Investing in a few key tools and devices can make RV electrical safety much easier. Consider these essential products (with affiliate links indicated by [Buy Now]) to protect your RV and your family. They’re the kind of gear that seasoned RVers and DIYers alike keep on hand:
⚡ Non-Contact Voltage Tester
A small pen-style voltage tester is invaluable for quickly detecting live voltage without touching wires. Use it to test the RV exterior for hot-skin conditions and to check outlets or cords for current. For example, before plugging in at a campground, use this tester on the pedestal casing or your RV’s frame – if it lights up, there’s a wiring fault.
It’s cheap, requires no electrical expertise, and can literally save lives by warning of an energized RV. Keep one in an easy-to-reach spot by your door.
🛡️ EMS Surge Protector
An Electrical Management System (EMS) with surge protection is a high-end surge protector that guards against:
- Lightning strikes or grid surges
- Sustained low or high voltage
- Open ground, open neutral, reverse polarity
- Surges on the neutral wire
When it detects danger, it instantly disconnects power to your RV. Some portable models also display voltage and error codes, helping you understand the problem. This device is like insurance for your electronics – it will take the hit so your gear doesn’t.
See RV Surge Protectors 101 for details, and check out 5 Best RV Surge Protectors in 2025 for top picks.
🔌 AC Outlet Analyzer
This is the small plug with three lights you insert into a standard outlet to check for proper wiring. It’s great when plugging into a friend’s garage or unknown outlet. The lights show if the outlet is correct, has an open ground, or reversed polarity.
While your EMS handles the big plug, a basic outlet analyzer lets you quickly verify any 15A receptacle – including outlets inside your RV. Some models also include a GFCI test button for extra peace of mind.
🧤 Insulated Electrical Gloves
When working on your RV’s electrical system – or even plugging in during rain – it’s smart to wear insulated electrical gloves. These rubber gloves are often rated up to 1000V and can prevent shocks from hidden faults.
Even for non-technical folks, gloves add a layer of safety when plugging into questionable pedestals. Make sure they’re rated, dry, and intact. They also come in handy for handling overheated cords or plugs safely.
🔌 Heavy-Duty RV Extension Cord
If your shore cable won’t reach the pedestal, a proper RV-rated extension cord (30A or 50A) is a must. These cords use thick wire to safely carry high current without voltage drop. Look for models with quality insulation and indicator lights.
You may also want a locking collar or adapter to keep extension connections secure. This gear helps avoid dangerous hacks or makeshift setups when the outlet is just out of reach.
📏 Multimeter (for Advanced Users)
If you’re a DIY RVer, a digital multimeter is your best friend. With it, you can:
- Measure voltage precisely
- Check fuse continuity
- Test battery levels
- Verify 50A outlet wiring (two 120V legs and 240V across)
A multimeter gives precision beyond a simple outlet tester. But only use one if you understand how – always set the correct range and insert probes properly. If not, stick to the non-contact tester and analyzer.
These tools might cost a bit upfront, but they quickly pay for themselves by preventing just one campground disaster or electrical failure. Think of them as part of your RV safety kit – like a fire extinguisher or tire gauge.
Finally, let’s wrap up by summarizing the key safety actions you should routinely take, and which tools or gear from above help you accomplish each. Feel free to use the following checklist as a quick reference before your next trip!
✅ RV Electrical Safety Checklist & Tool Guide
To make things easy, here’s a summary table of critical safety actions to take with your RV’s electrical system, along with the recommended tool or product that helps with each task. Use this as a final checkpoint to ensure you’ve covered all bases:
| 🛠️ Safety Action | ✅ Recommended Tool(s) |
|---|---|
| Test pedestal outlet wiring before plugging in | Multimeter or Outlet Analyzer – check for ~120V, proper ground |
| Shut off power before connecting or disconnecting | (No tool needed, just procedure) – Always flip the pedestal breaker off first |
| Use surge protection at every hookup | EMS/Surge Protector [Buy Now] – monitors mis wires, surges, voltage issues and disconnects unsafe power |
| Verify RV chassis is not “hot” (electrified) | Non-Contact Voltage Tester – scan metal parts for voltage after plugging in |
| Keep connections tight and secure | Ensure shore plug is fully inserted and locked (use locking rings/cord straps). Feel for warmth periodically |
| Inspect power cord and plugs for damage | Look for cracks, burn marks, or melting on plugs/outlets each time you connect. Replace worn components promptly. |
| Use proper rated cords and adapters | Heavy-Duty RV Extension Cord and Dogbone Adapters – correct gauge for 30A/50A to avoid overheating. Never remove ground pin. |
| Avoid overloading circuits | Manage appliance use (e.g., one major appliance at a time on 30A). Consider a plug-in watt meter or energy monitor to track usage. |
| Investigate any tripped breaker or blown fuse | Unplug devices or use Clamp Meter to measure current. Don’t reset blindly – find the fault and reduce load. |
| Perform regular electrical maintenance | Screwdriver (tighten terminals), Flashlight, Multimeter – check battery voltage, look for loose wires monthly. |
| Practice generator safety | Use built-in Transfer Switch or proper generator cord. No “backfeeding”! Use CO Detector and run generator outside. |
| Have emergency fire safety gear on board | Smoke/CO Alarms and Fire Extinguisher (see Top RV Fire Safety Gear) – early warning and ability to stop electrical fires. |
📝 Keep this checklist handy and run through it whenever you set up camp or do RV maintenance. RV electrical safety might seem like a lot to remember at first, but with these habits and tools in place, it becomes second nature.
You’ll gain peace of mind knowing you’ve proactively avoided the common pitfalls that lead to RV shock hazards, fires, or equipment damage.
🚐 Conclusion
RVing is all about enjoying the journey and destinations – the last thing you want is an avoidable electrical disaster derailing your adventures. By following the tips above, you can confidently plug in your home on wheels, fire up your appliances, and relax knowing you’ve taken the proper precautions.
From full-timers running extensive setups to first-timers on their maiden voyage, these safety principles apply to everyone. Stay vigilant, use the right gear, and happy (and safe) travels!