RV Water Pump Buying Guide: How to Choose the Right Pump for Your Rig
Last updated: January 2026
Affiliate Disclosure: This article contains affiliate links. If you click through and make a purchase, I may earn a small commission at no extra cost to you. This helps support RVOutfitting’s deep-dive research.
Editor’s Note: This guide is based on a deep-dive analysis of real owner feedback, forum discussions, and long-term usage reports across hundreds of RV water pump installations. We cut through the marketing specs to tell you what actually matters when your pump starts acting up at 2 a.m.
🎯 Already know what you need? Jump straight to our tested recommendations in the 10 Best RV Water Pumps for Reliable Pressure list.
Why Your RV Water Pump Choice Matters More Than You Think
A dying RV water pump rarely fails in a polite way. It starts with small symptoms: the pump runs longer than usual after you wash your hands. Then it thumps when it kicks on. Then it wakes you up at 2:00 a.m. because it’s cycling for no obvious reason. And when it finally quits? That’s when you realize how many “small” RV tasks—dishes, toilets, showers, quick winterizing—depend on that one box under a cabinet.
The pain points that drive RVers crazy:
- The midnight woodpecker effect: Pumps that cycle on/off rapidly, turning your rig into a percussion instrument
- Pressure switch drama: The #1 failure point across every brand—pumps that won’t shut off, cycle randomly, or quit working entirely
- The “it arrived wet” surprise: Quality control variability that leaves you wondering if your pump was actually new
- Fitting frustration: Plastic threads that cross-thread, ports that don’t match what you expected, and adapters that weren’t included
Here’s the big takeaway: Success isn’t about buying the most expensive brand. It’s about matching the right pump to your specific rig, installing it correctly, and knowing exactly what to test before you button everything back up.
If you’re still getting your head around how the whole RV plumbing system flows from tank to faucet, start with this primer: RV Water System 101: How Your RV Gets Water.
Quick Summary: The 30-Second Verdict
The Golden Rule: The pressure switch is everything. Across hundreds of owner experiences, pressure switch behavior—whether it shuts off cleanly, cycles predictably, and holds pressure over time—determines whether you’ll love your pump or rage-replace it within months.
5 Questions to Ask Before Buying:
- Does this pump’s footprint match my existing setup (same ports, same mounting, same wiring)?
- Am I prepared to add a strainer/filter if one isn’t included?
- Is my RV’s wiring adequate for this pump’s current draw (especially for higher-output models)?
- Will I test the shutoff behavior immediately—before my return window closes?
- Does my system have any existing leaks that could make any pump look “defective”?
The “Don’t Do This” Warning: Never overtighten plastic threaded ports. Across multiple brands, owners report cross-threading, cracked housings, and stripped threads from rushing the install. Start threads by hand, align carefully, and tighten just enough to seal—don’t muscle it.
1. Pick Your Lane: Risk vs. Convenience
There is no single “best RV water pump.” What works perfectly in a Class A motorhome might be overkill (or underkill) for a pop-up camper. The right choice depends on your risk tolerance, install comfort level, and how you actually use water in your rig.
| Lane | Who It’s For | What You Give Up |
|---|---|---|
| Budget/Value Tier (ECO-WORTHY, SEAFLO 33, Kohree) | RVers who want solid performance at a lower price point; comfortable with potential fitment quirks and basic troubleshooting | Consistency. You may need to play the “return and replace” game if you get a bad unit. Warranty support can be hit-or-miss. |
| OEM-Replacement Tier (SHURFLO 4008, Lippert Flow Max, RecPro) | RVers who want a familiar footprint swap with decent brand recognition; value “it fits like the old one” convenience | Premium performance. These are designed to be “good enough,” not “shower like home.” Some models have notable QC complaints. |
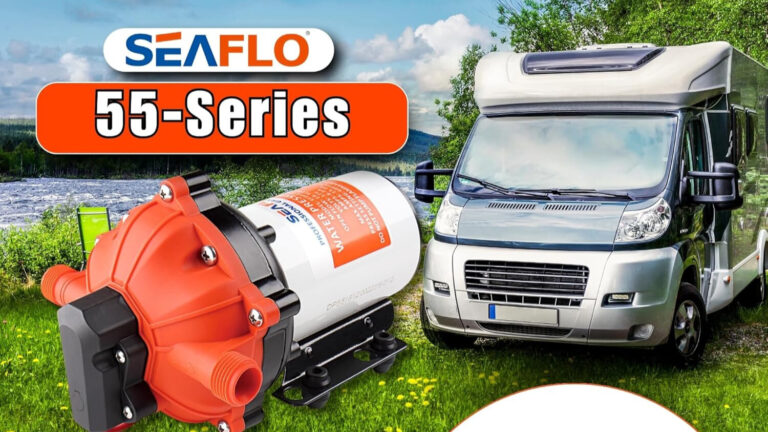
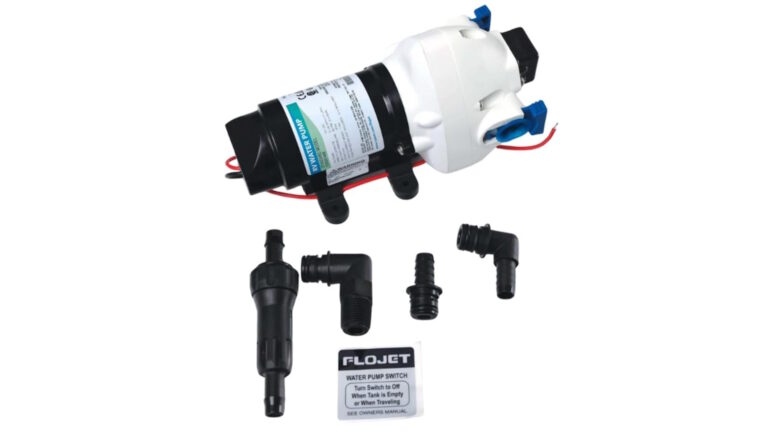
| Premium/Upgrade Tier (Remco Aquajet, SEAFLO 55-Series, Flojet triplex) | Full-timers, larger rigs, anyone who wants multi-fixture performance and is willing to install it right | Budget. Higher cost, higher current draw, and you may need to upgrade wiring or add pressure protection for older plumbing. |
Regional Note: In the USA and Canada, 12V DC pumps are standard for RV fresh water systems. In Australia, many caravans also run 12V systems, but shore power is typically 230V—don’t confuse a 12V RV pump with a mains-powered booster. Always verify voltage compatibility before purchasing.
2. Fit, Compatibility & Sizing: The “Boring” Stuff That Matters
Before you click “Buy Now,” confirm these physical and technical constraints that owners often miss until installation day.
The Pre-Purchase Checklist:
- Voltage: Confirm 12V DC (standard for most USA/Canada/Australia RVs). Higher-output pumps may specify 24V for larger systems.
- Flow rate (GPM / LPM): 3.0 GPM (~11.4 L/min) handles typical single-fixture use. 5.0+ GPM is for multi-fixture households or “city-water-like” pressure goals.
- Pressure rating (PSI / bar): 45–55 PSI (3.1–3.8 bar) is typical. Higher pressure can expose weak fittings, so know your system’s limits.
- Current draw (Amps): Higher-output pumps (5+ GPM) can draw 10–15A at startup. Verify your wiring gauge and fuse capacity.
- Port style: NPT threaded? Quick-connect? Barbed fittings? Match your existing plumbing or plan adapters in advance.
- Mounting footprint: Measure your existing pump bay. Even “direct replacement” pumps can vary by half an inch—which matters in tight compartments.
Common Regret: The “It Should Fit” Mistake
Owners who had to adapt fittings or force compatibility describe significantly more frustration than those doing a true footprint swap. One recurring pattern: buyers assume “½-inch” means universal compatibility, then discover thread types don’t match (NPT vs. BSP vs. metric). The result? Damaged threads, leaking connections, and a trip to the hardware store mid-install.
If you’re already fighting weak flow and aren’t sure whether it’s the pump or something else, this troubleshooting guide is the fastest way to stop guessing: Troubleshooting Low Water Pressure in Your RV.
3. Real-World Performance: What Actually Happens After Install
Marketing Claims vs. Owner Reality
| Marketing Claim | What It Actually Means |
|---|---|
| “Quiet operation” | Quietness depends heavily on mounting and plumbing, not just the pump. The same pump can be whisper-quiet in one rig and loud in another based on vibration transfer. |
| “3.5 GPM flow rate” | Real-world flow is always lower than rated. Expect 70–85% of advertised flow once you account for fittings, line restrictions, and filter drag. |
| “Automatic on/off” | When the pressure switch works correctly, it’s magic. When it doesn’t, you get cycling, running when nothing is open, or failure to shut off at all. |
| “Self-priming” | True for most diaphragm pumps, but priming time depends on suction lift, line length, and whether you have air leaks on the inlet side. |
| “Easy installation” | Easy when it’s a true footprint match. Complicated when you’re adapting fittings, rerouting lines, or dealing with a tight compartment. |
The Two Performance Factors That Matter Most
Factor 1: Pressure Switch Behavior
Across the owner feedback I analyzed, pressure switch reliability is the single most polarizing factor. When the switch works properly:
- The pump stops cleanly when you close faucets
- Pressure holds overnight without mystery cycling
- You forget the pump exists—which is exactly what you want
When the switch fails or misbehaves:
- The pump runs continuously (draining your battery and potentially overheating)
- Random cycling wakes you up at night
- The pump can’t reach shutoff pressure, creating a frustrating “endless run” scenario
Factor 2: Noise and Vibration
Owners commonly report two completely different experiences with the same pump model:
- Camp A (happy): “Quieter than my old pump,” “barely noticeable at night”
- Camp B (frustrated): “Vibrates the whole cabinet,” “sounds like a jackhammer”
The difference almost always comes down to installation. A pump mounted hard to a thin, resonant panel will broadcast vibration throughout your rig. The same pump mounted on rubber isolators with flexible line connections can be dramatically quieter.
4. The Setup: Where Most Failures Happen
If you install your pump like a basic OEM swap and call it a day, you might get lucky. But the consistent “best outcomes” share the same installation habits.
Step-by-Step Best Practice Setup
Step 1: Kill power and depressurize
Turn off the pump switch and 12V feed. Open a faucet to relieve system pressure. If you’re cautious (you should be), pull the fuse or disconnect the RV battery.
Step 2: Plan your fittings before you disconnect anything
Take photos of your current setup. Note wire polarity, inlet vs. outlet orientation, and fitting types. If adapters are needed, have them ready before you start.
Step 3: Install a strainer/filter on the inlet side
Even if your old setup didn’t have one, add it now. Debris is a pump killer—a simple inline strainer protects valves and helps the pressure switch behave predictably.
Step 4: Mount for silence
Use rubber isolation feet or a vibration-damping pad. Avoid mounting directly to thin plywood or hollow cabinet panels. Secure the pump so it can’t “walk” over time as mounting screws loosen.
Step 5: Use flexible lines to break vibration transfer
Short braided flex lines (or flexible hose sections) on inlet and outlet can dramatically reduce perceived noise. Keep lines from slapping against cabinet walls or flooring.
Step 6: Wire it like a high-demand 12V appliance
Use appropriate gauge wire for the run length (14 AWG or heavier for longer runs). Use proper fusing close to the power source. Ensure clean, tight ground connections.
Step 7: Prime and test immediately
Fill your fresh tank, run water at the closest faucet until air clears, then close all fixtures. Listen. The pump should stop and stay stopped. If it cycles, check for drips, loose clamps, and inlet-side air leaks before blaming the pump.
For a complete visual walkthrough, keep this open while you work: How to Replace an RV Water Pump (DIY Step-by-Step Guide).
The “Wake-Up” Call: Why Pumps Misbehave After Good Installs
One pattern that comes up repeatedly is that pump problems often aren’t pump problems—they’re system problems. A pump that “won’t shut off” is usually responding to:
- A tiny leak somewhere downstream (even a slow drip)
- Air entering the suction side through a loose fitting
- A check valve that isn’t sealing properly
- Pressure bleeding back through the pump path into the fresh tank
Before you return the pump, systematically check every fitting. Many owners describe the same scenario: they blamed the pump, did the return/replace dance, and eventually discovered a pinhole leak or loose clamp that was the real culprit.
5. Reliability & Support: The Hidden Cost
The “Support Experience” Reality
Owner feedback reveals a consistent pattern across multiple brands: warranty support is highly variable. Some buyers report smooth replacements and helpful customer service. Others describe frustrating loops of “prove it’s defective,” shipping costs that eat into the pump’s value, and sellers who don’t clearly honor manufacturer warranties.
What owners commonly experience:
- Units that arrive “wet” (from factory testing, but still unnerving)
- Packaging damage that makes you wonder if the pump was handled roughly
- Missing parts or instructions depending on the seller/listing variant
- Occasional “seems used or refurbished” concerns
Buyer Protection Plan: What to Do Immediately Upon Arrival
Smart Arrival Protocol:
- Inspect the packaging before you even open it—document any damage with photos
- Confirm all parts are present (fittings, strainer, mounting hardware if listed)
- Look for signs of prior use (water residue beyond normal factory testing, scratches, worn threads)
- Install and test within the return window—don’t wait until your next camping trip
- Keep the original box until you’ve confirmed the pump works correctly for at least one full use cycle
- Test shutoff behavior specifically: close all faucets and verify the pump stops and stays stopped for at least 30 minutes
6. Pre-Purchase Checklist (Save This)
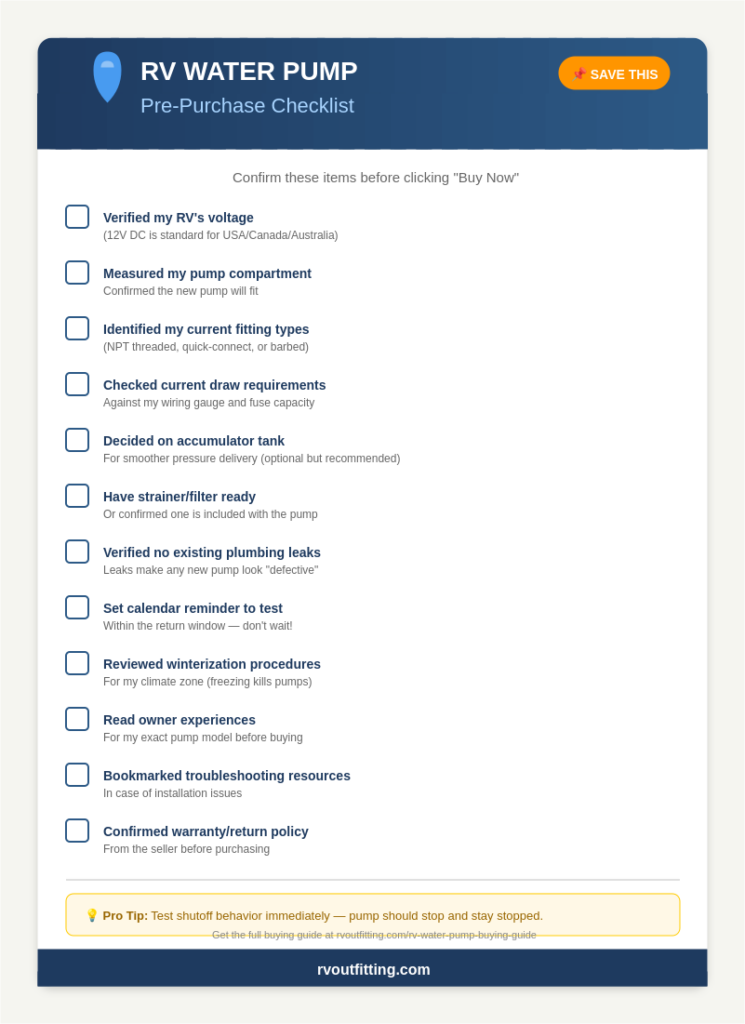
Before You Buy—Confirm These Items:
- Verified my RV’s voltage (12V DC is standard for USA/Canada/Australia)
- Measured my pump compartment and confirmed the new pump will fit
- Identified my current fitting types (NPT threaded, quick-connect, barbed)
- Checked current draw requirements against my wiring and fuse capacity
- Decided whether I need/want an accumulator tank for smoother pressure
- Have a strainer/filter ready to install (or confirmed one is included)
- Verified my plumbing system has no existing leaks
- Set a calendar reminder to test within the return window
- Reviewed proper winterization procedures for my climate zone
- Read specific owner experiences for my exact pump model
- Bookmarked troubleshooting resources in case of installation issues
- Confirmed seller warranty/return policy before purchasing
7. Who Should Buy What? (Buyer Personas)
The Weekender
Your profile: You camp a few times per season, primarily at campgrounds with hookups. You use city water most of the time and only need the pump for occasional off-grid stops.
What you need:
- A reliable OEM-replacement pump that “just works”
- Moderate pressure (45–55 PSI / 3.0–3.5 GPM is plenty)
- Quiet enough not to wake the family on overnight trips
What to avoid:
- Overkill premium pumps with high current draw
- Bottom-tier budget pumps where QC variance is highest
- Complex variable-speed systems you’ll never fully utilize
Best fit: SHURFLO 4008-style pumps, Lippert Flow Max, or RecPro replacements
The Full-Timer / Heavy User
Your profile: You live in your RV or travel extensively. You boondock regularly, run multiple fixtures, and demand reliable water pressure every single day.
What you need:
- Higher flow capacity (5.0+ GPM) for multi-fixture comfort
- Rock-solid pressure switch reliability (this is non-negotiable)
- Premium build quality that justifies the higher price
- An accumulator tank to smooth out pressure delivery
What to avoid:
- Budget pumps with documented QC issues
- Pumps with poor warranty support track records
- Any pump you can’t easily access for maintenance
Best fit: Remco Aquajet, Flojet triplex pumps, or premium SEAFLO 55-Series with proper installation
The Budget Hunter
Your profile: You want solid performance without premium pricing. You’re comfortable doing basic troubleshooting and don’t mind the occasional return/exchange if you get a dud unit.
What you need:
- Best value-per-dollar in the 3.0–3.5 GPM class
- Willingness to install a strainer, test thoroughly, and adjust as needed
- Realistic expectations about consistency
What to avoid:
- Assuming “cheap = bad”—many budget pumps perform excellently when installed correctly
- Skipping the strainer and vibration isolation steps
- Installing in a hard-to-access location where troubleshooting becomes a nightmare
Best fit: ECO-WORTHY 12V, SEAFLO 33-Series, Kohree RV pumps
FAQ: Data-Backed Answers to Common Questions
1. Is a more expensive pump actually quieter?
Not automatically. Across owner feedback, noise is primarily an installation outcome, not a purchase decision. A $150 pump mounted correctly can be quieter than a $300 pump bolted hard to a resonant panel. If silence is your priority, invest in proper vibration isolation and flexible line connections regardless of which pump you choose.
2. Do I need an accumulator tank?
Owner experiences are mixed. Accumulator tanks help with:
- Reducing rapid cycling (pump doesn’t kick on for every sip of water)
- Smoothing pressure pulses (less “heartbeat” feel at faucets)
- Reducing noise (fewer on/off cycles means less pump activity)
However, some owners report that accumulators don’t pair well with certain pump configurations, and incorrect placement can create its own problems. If you add one, verify the recommended pressure settings and placement for your specific pump.
3. Why does my new pump cycle when no faucets are open?
This is almost always a system problem, not a pump defect:
- A tiny leak downstream (check toilet valve, shower head, ice maker line)
- Air entering the suction side through a loose fitting
- Pressure bleeding back through the pump’s internal check valve
- A fitting that’s seeping slowly
Systematically inspect every connection before initiating a return.
4. Can a high-pressure pump damage my RV plumbing?
Yes, if your system has weak links. Older fittings, marginal hose clamps, and previously repaired connections can fail under higher pressure. If you’re upgrading to a pump with higher PSI than your old one, consider adding a pressure gauge during testing and inspect vulnerable points carefully.
5. Why would city water fill my fresh tank when the pump isn’t running?
This “backflow” issue happens when city water pressure pushes backward through the pump path into your fresh tank. Solutions include:
- Adding an inline check valve (one-way valve) on the pump outlet
- Installing a shutoff valve to isolate the pump line when on city water
This is common enough that experienced RVers treat it as a standard preventive step. For more on managing campground pressure, see: Best RV Water Pressure Regulators (and How to Use Them).
6. What’s the most common installation mistake?
Rushing the fittings. Plastic threaded ports are unforgiving—cross-threading and over-tightening are the most repeated pain points across all brands. Always start threads by hand, align carefully, and tighten just enough to seal. If it binds, stop immediately.
7. How do I know if I got a “bad unit” vs. having an installation problem?
Test systematically:
- Verify the pump primes and builds pressure (proves the pump itself works)
- Close all fixtures and listen for cycling (proves shutoff behavior)
- Check if pressure holds for 30+ minutes (proves the system is sealed)
- If pressure bleeds off, you likely have a leak—not a pump defect
Final Verdict
Choosing an RV water pump isn’t about finding the “best” brand—it’s about matching the right pump to your specific rig, installing it with attention to detail, and testing thoroughly before you trust it on the road.
The “Lane” Strategy Summarized:
- Budget-conscious and DIY-comfortable? Go with a value-tier pump, install it carefully, and test within your return window.
- Want familiar reliability without premium pricing? Choose an OEM-replacement tier pump with a footprint that matches your current setup.
- Full-timing or demanding multi-fixture performance? Invest in a premium pump, upgrade your wiring if needed, and add an accumulator tank for the smoothest experience.
Regardless of which lane you choose, the fundamentals remain the same: use a strainer, isolate vibration, wire it properly, and test the shutoff behavior immediately. Do those things, and you’ll dramatically increase your odds of getting the “quiet, reliable, forget-it-exists” pump experience.
Ready to choose a specific model? We’ve ranked the top performers based on these criteria.
👉 See the top picks: 10 Best RV Water Pumps for Reliable Pressure