RV Solar Maintenance & Troubleshooting Guide: How to Keep Your System Running Smoothly
RV Solar Maintenance
🧽 Keeping your RV’s solar power system in top shape is key to enjoying stress-free off-grid adventures. After the excitement of installing your panels, batteries, and inverter, it’s important to give your system a little post-installation TLC. Regular RV solar maintenance not only prevents annoying power outages on the road, but also extends the lifespan and performance of your equipment. In this guide, we’ll walk through a friendly, step-by-step approach to maintaining your RV solar setup, seasonal care tips for winter and summer, and how to troubleshoot common RV solar system issues. By the end, you’ll know exactly how to maintain RV solar panels, batteries, and other components so your system runs smoothly for years to come.
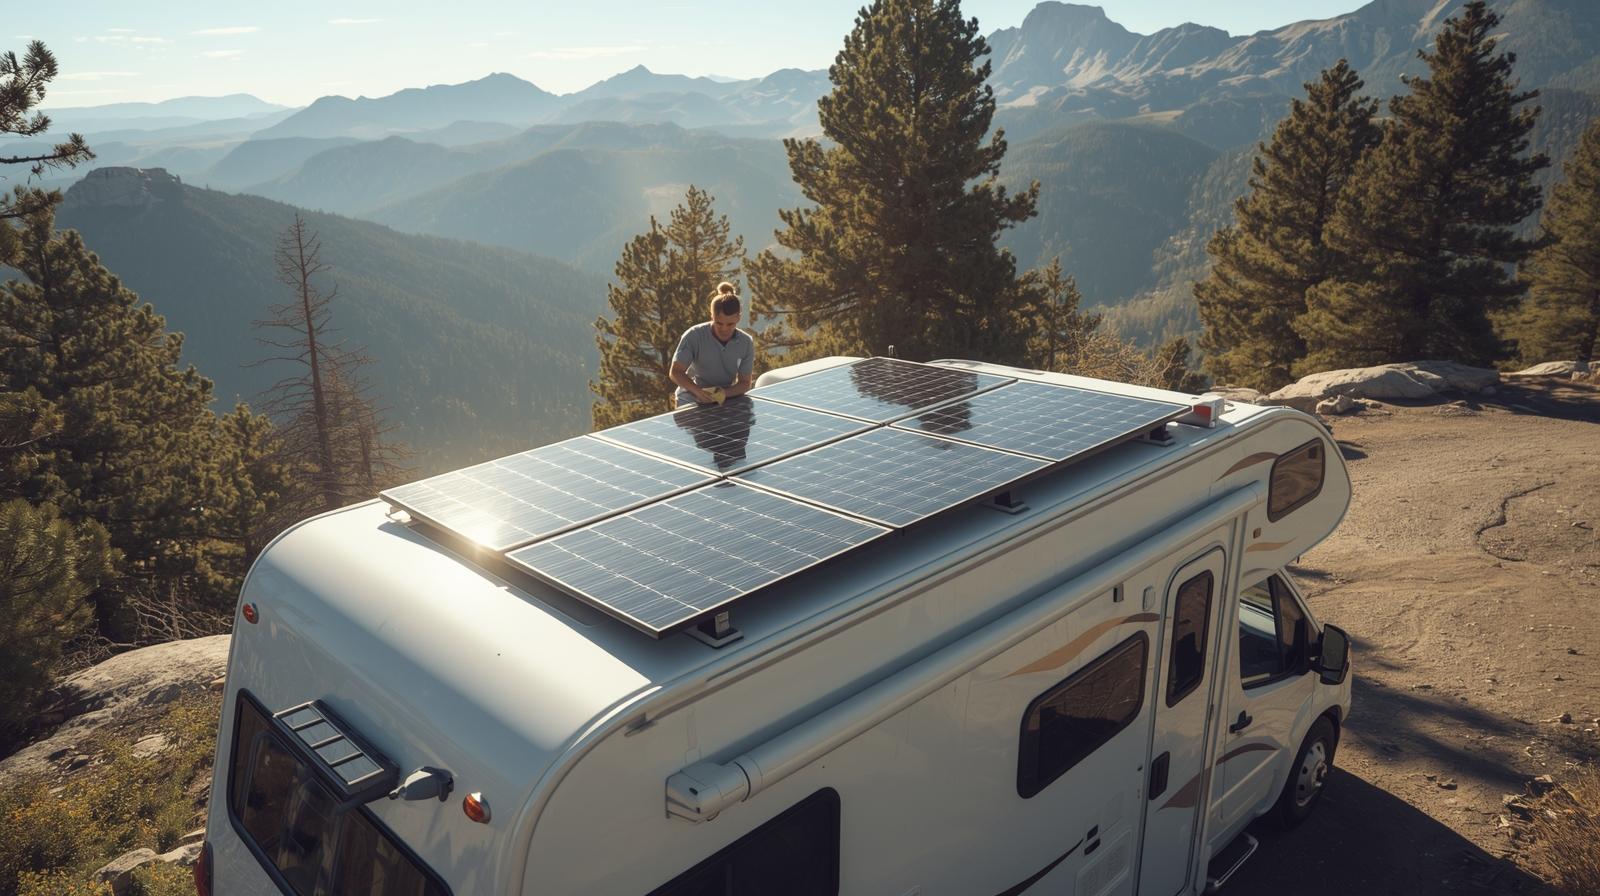
🔧 Regular maintenance ensures your RV solar panels (like the ones on this travel trailer) keep delivering power wherever you roam. Proper care helps you avoid problems down the line and protects the investment you made in your solar setup. We’ll start with a routine maintenance checklist, then cover seasonal tips (from snowy winters to hot summer storage), and finally dive into RV solar troubleshooting for common issues like panels not charging or batteries not holding a charge. Let’s get started!
Routine RV Solar Maintenance Checklist
🧰 Think of routine RV solar maintenance as a preventive check-up for your RV’s solar power system. It doesn’t take much time, and a proactive approach will ensure you have power when you need it most. Use the checklist below as a guide to keep your system in peak condition:
1. Cleaning Your Solar Panels
Over time, dust, dirt, pollen, and grime can accumulate on your solar panels, reducing their efficiency. Cleaning the panels regularly is one of the most important steps to maintain performance. Here are some panel cleaning tips:
- 🧽 Use Gentle Tools: Rinse the panels with plain water and wipe with a soft sponge or microfiber cloth. For stubborn grime (like bird droppings or sap), use a mild, non-abrasive soap solution. Avoid harsh chemicals that could damage the panel’s surface.
- 🚫 No Pressure Washers: It’s not recommended to use high-pressure sprays, as they can crack or scratch the panels. A regular garden hose or a spray bottle will do the job without risking damage.
- 🍃 Remove Debris Promptly: Clear off leaves, pine needles, or pollen buildup, especially after camping under trees. Bird droppings should be cleaned as soon as possible since they can block sunlight and may harden on the panel.
- ❄️ Snow Removal: In winter, use a soft brush (such as a foam broom) to gently push off snow. Keeping panels clear of snow ensures they continue producing power in cold, sunny conditions.
- 🌧️ Driving Helps: Wind while driving can blow off loose dust, and rain can wash away a lot of dirt. Even so, a hands-on cleaning every few months (or more frequently in dusty areas) will maximize your solar output.
🔎 If you have flexible solar panels, clean with extra care – their surface is more delicate than rigid glass panels. Wipe flexible panels softly with a damp cloth and mild soap, avoiding any abrasive pads that could scratch them. Always check your panel manufacturer’s guidelines for any model-specific cleaning recommendations (this helps you stay within warranty requirements).
🛠️ Helpful Gear: Consider using a solar panel cleaning kit to make the job easier. These kits often include a telescoping pole with a soft brush and squeegee that let you reach rooftop panels safely from the ground. A telescopic RV solar cleaning brush with an attachable hose allows you to wash and rinse panels without climbing on the roof. Having the right tools handy will simplify your panel maintenance and ensure a streak-free shine.
2. Checking Connections and Wiring
Life on the road means your RV is subject to constant vibrations and jolts. Over time, wires and electrical connections in your solar system can loosen or corrode, which can lead to performance issues or even safety hazards. Make it a habit to inspect all the electrical connections and wiring periodically:
- 👀 Visual Inspection: Look over the cables from your solar panels to the charge controller, from the controller to the batteries, and from the batteries to the inverter. Ensure there are no obvious signs of damage like cracked insulation, exposed wire, or chew marks.
- 🔧 Tighten Loose Connections: Check that all screw terminals are snug and all plug connectors (like MC4 connectors between panels) are firmly clicked together. Loose wire connections can cause intermittent power loss or overheating. Use a screwdriver to gently tighten battery terminals and electrical lugs if needed (always turn off the system or isolate power before touching wiring).
- 🧪 Check for Corrosion: Battery terminals and any exposed metal connectors can develop corrosion (a white or greenish powdery substance) which inhibits electrical flow. If you see corrosion, disconnect the power and clean the terminals. A paste of baking soda and water or a commercial terminal cleaner can neutralize acid and scrub off corrosion. After cleaning, reconnect everything securely and consider applying a little dielectric grease to terminals to slow future corrosion.
- 🧯 Test Fuses and Breakers: Your RV solar system likely has fuses or circuit breakers for safety. Verify that none of the fuses are blown and that breakers haven’t tripped. If you carry a fuse tester or multimeter, you can quickly test continuity across fuses to be sure. Replace any blown fuses with the correct type and rating, and keep spares on hand.
- 🪢 Cable Management: Make sure wiring is secured and not flapping around. Use zip ties or cable clamps to anchor wires so they don’t chafe on sharp edges or get pinched in moving parts. Pay special attention to where wires pass through the roof or walls – the grommets or seals should be intact to prevent water leaks and abrasion of the cables.
⏱️ Taking time to check your wiring and connections every few months (and especially after driving on very rough roads) will catch small issues before they become big problems. A quick once-over on all electrical connections is often enough to ensure nothing has vibrated loose out of place.
3. Battery Care (AGM vs. Lithium and More)
🔋 Your battery bank is the heart of your RV’s solar power storage. Whether you have traditional flooded lead-acid batteries, sealed AGM (Absorbed Glass Mat) batteries, or high-tech lithium (LiFePO₄) batteries, proper care is essential to keep them healthy and performing optimally. Here’s how to maintain your RV batteries and what to look out for, with notes on different battery types:
👀 Regular Inspections: Check your batteries at least monthly. Look for any bulging, cracks, or leaks in the battery casing. Catching a swelling or leaking battery early can prevent a dangerous failure. Also, sniff for any sulfuric “rotten egg” smells around lead-acid batteries – that could indicate overcharging or a leak.
🧼 Keep Terminals Clean & Tight: Ensure the battery terminals are clean and all connections are tight. Corrosion on battery posts (a whitish powder) should be cleaned off to maintain good contact. Disconnect the cables (starting with the negative (–) cable for safety), clean the terminals and cable ends with a wire brush or battery terminal cleaner, then reconnect everything securely. This prevents voltage drops and ensures efficient charging and discharging.
📊 Charging and Voltage Checks: Monitor your state of charge regularly. Using a battery monitor or multimeter, verify that resting voltage is healthy (for example, ~12.6V for a full lead-acid battery, ~13.3–13.6V for a full LiFePO₄). If you have a BMS or a monitor (e.g., Victron BMV-712 or Renogy Battery Monitor), watch SOC trends. Fully charge when possible and avoid letting batteries sit very low for long periods.
💧 Top Off Water (Flooded Batteries): If you run flooded lead-acid batteries, check electrolyte levels periodically (e.g., monthly). Only check when fully charged, and top cells with distilled water so plates remain covered. Never let plates be exposed to air; proper levels help prevent sulfation and permanent capacity loss.
🧠 Understand Battery Types: Different batteries have different maintenance needs. Lead-acid batteries (including AGM) need periodic care—flooded ones need water and venting, while AGMs are sealed but still require correct charging voltages. AGM batteries don’t spill or require water, tolerate cold better than flooded, but are sensitive to overcharging (set your controller correctly). Lithium (LiFePO₄) batteries are sealed, low-maintenance, and often include a BMS. They deliver excellent performance and long life, but shouldn’t be charged at freezing temperatures (see winter tips).
🔌 Keep Batteries Charged (but not overcharged): If your RV is stored, use a battery maintainer or smart trickle charger to hold a safe float voltage. Lead-acid batteries can sulfate if left partially discharged. If your solar charge controller stays connected during storage, ensure it has proper bulk/absorption/float stages and is configured for your chemistry.
⚖️ AGM vs Lithium – What’s the Difference in Care? AGMs are low-maintenance but still need correct setpoints and periodic terminal checks. Lithium is even lower maintenance—no water, minimal corrosion—and excels in usable capacity and cycle life. The BMS may block charging below freezing or during fault/over-voltage; warm the pack or resolve the condition before charging resumes.
♻️ Replace Aging Batteries: Lead-acid batteries typically last ~4–6 years with good care, while lithium can last 10+ years. If capacity fades despite proper maintenance, consider replacement. Many RVers upgrade from lead-acid to LiFePO₄ (e.g., Battle Born 100Ah, Renogy, Victron) for longer life and better performance. Track age/SOC behavior to decide the right time.
✅ By following this battery maintenance checklist, you’ll help your bank deliver peak performance and enjoy a longer life—meaning more free camping nights and fewer costly replacements over the years.
4. Inspecting Mounts, Brackets, and Sealant
🔎 Solar panel mounts on an RV rely on sturdy hardware and watertight sealing. Because panels and wiring often penetrate the roof, include these points in your regular maintenance.
🔩 Check Mounting Hardware: Safely access the roof and inspect brackets/frames holding your solar panels. Ensure bolts, screws, or rivets are tight. Gently wiggle each panel—there should be no play or rattling. Tighten loose fasteners (avoid overtightening). Replace cracked brackets or badly rusted hardware immediately.
🧴 Inspect Roof Sealant: Examine sealant around mounts and cable entries (glands/junction boxes). UV and weather can crack or lift sealant over time. If you see gaps or lifting edges, clean and re-seal with a compatible RV roof sealant (e.g., self-leveling lap sealant). A thorough annual inspection and touch-ups prevent leaks and water damage.
🧰 Cable Entry and Glands: The roof pass-through should be sealed with proper strain relief. Tighten gland nuts and add sealant if gaps are visible. Verify any conduit or protective tubing is intact and secured to prevent chafing.
🧹 General Roof Condition: Clear debris (twigs, leaves, pollen) around panels and mounts. Ensure tilt brackets (if used) don’t scuff the roof when panels are down. Confirm nothing rubs on cables or frames.
🛠️ Aftermarket Accessories: If you installed panels yourself, inspect those new penetrations more often. Keep everything watertight and firmly attached. Address minor issues (loose screw, small leak) immediately to avoid bigger problems.
🌦️ Performing these checks at least once or twice a year—especially before/after big trips or winter storage—keeps panels secure and your roof protected. A secure mount and good sealant = happy panels and a dry RV!
Seasonal Care for RV Solar Systems
Your RV solar setup faces very different challenges in winter versus summer. Seasonal care is all about adjusting maintenance to the conditions – from snowy, short days of winter to blazing hot summer sun. In this section, we’ll cover winter RV solar care and summer/off-season storage tips to keep your system safe and efficient year-round.
Winter RV Solar Care Tips
❄️ Winter can be tough on any RV system, and solar is no exception. Colder temperatures, lower sun angles, and snow or ice require a few extra steps to maintain your solar power through the winter months. Whether you’re camping in winter or parking your RV in storage, consider these winter care tips:
1) Keep Panels Clear of Snow
🧹 Solar panels can’t do their job if they’re buried under snow. After any snowfall, use a soft brush or broom to gently remove snow from your panels. Avoid using metal shovels or hard scrapers that could scratch the glass. Clearing snow not only lets the sun back in to generate power, it also prevents heavy snow from putting weight on your panel mounts. If you’re camping in a spot for a while, try to clear snow daily or as needed – a few minutes of effort can keep your batteries charging and your RV powered up.
2) Optimize Sun Exposure
🌤️ Winter days are shorter and the sun is lower in the sky. If possible, park your RV where the panels get the most direct sun (avoiding shade from trees or buildings, especially during the key midday hours). If you have portable panels or adjustable mounts, tilt them toward the sun to improve winter production. Even angling panels 30–45° can make a difference in capturing weak winter sunlight. Every bit of extra power helps when the sun is scarce!
3) Monitor Battery Temperature
🌡️ Batteries (especially lithium) are sensitive to cold. Lithium (LiFePO₄) batteries in particular should not be charged when below freezing (32°F/0°C) unless they have a built-in heating system or thermal protection. Charging a frozen lithium battery can cause irreversible damage. Many quality lithium RV batteries include a low-temperature cutoff or heater, but it’s good to know your specific battery’s features. If your lithium bank is not “heated” and you expect temps to drop below freezing, you have a few options:
- 🧣 Prevent Freezing: If using the RV, keep the battery compartment somewhat warm (some people add insulation or a 12V heating pad/blanket for the batteries). If storing the RV, you might remove the lithium batteries and keep them indoors where it’s warmer.
- 🔌 Disconnect if Necessary: If non-heated lithium batteries do drop below safe charging temperature, it’s often best to fully charge them, then disconnect them for the coldest period. A fully charged lithium won’t freeze until extremely low temperatures. Reconnect and recharge when the batteries are warmed up or when you can maintain them above freezing.
🧊 Lead-Acid in Winter: Lead-acid batteries (including AGM) can handle cold weather a bit better when it comes to discharging, but they must be kept charged. A partially discharged lead-acid battery can freeze in sub-zero temperatures, potentially cracking the case. A fully charged lead-acid battery has a lower freezing point. So, keep those batteries topped off. If you’re storing the RV and can’t periodically charge the batteries, it’s safer to remove them and store them in a garage or basement (above freezing) on a maintainer.
4) Cover Panels if Storing Without Batteries
🛡️ If you are winterizing your RV and decide to remove the batteries for indoor storage, cover your solar panels with an opaque cover (or disconnect them) for the winter. Without a battery or load connected, your panels would otherwise be producing power with nowhere to go, which could potentially damage your charge controller or other electronics. By covering the panels, you effectively turn them “off” — they’ll patiently wait until you reinstall the batteries in spring before waking up again.
5) Use a Solar Maintainer (Optional)
🔋 If you leave your batteries in the RV over winter and your solar panels are mostly clear, the solar system can act as a battery maintainer. Just ensure the charge controller is set correctly for long-term float charging. It will keep trickling in charge on sunny days to counteract self-discharge. Check on the RV periodically to ensure everything is working (and no errors on the controller). If heavy snow is expected and you can’t clear it, you may still want an AC-powered maintainer as backup or plan to charge the batteries fully before the storm.
6) General Winter Prep
🧰 Winter is also a good time to double-check all your solar wiring and components. Cold can make cables stiffer and brittle, so ensure nothing is stretched tight that could snap. Also, consider the reduced solar output – if you’re camping, you might need to conserve power more or run a generator occasionally during stretches of bad weather. The goal of winter solar care is to protect your equipment from the cold and keep your system functional and safe through the season.
✅ By taking these winter precautions, you’ll avoid the common pitfalls (like frozen batteries or snow-blocked panels) that many RVers experience. Your solar system will thank you come spring, and you’ll roll out with everything in great shape for another year of travels.
Summer RV Solar Care and Off-Season Storage
☀️ When summer comes around, RV solar care mostly involves dealing with heat and periods of intense sun or inactivity. Hot temperatures can affect your panels, batteries, and electronics, and if you park your RV for weeks or months (off-season storage), you’ll want to prepare your solar setup so it doesn’t suffer in the meantime. Keep these summer and storage tips in mind:
1) Prevent Overheating of Components
🌡️ Extreme heat can reduce the efficiency of solar panels and put strain on batteries and the inverter/charge controller. Make sure all your equipment has adequate ventilation. If your inverter or charger is in a compartment, keep that compartment vented or open it occasionally so heat can escape. In very hot weather, even the panels benefit from airflow underneath—this helps them stay cooler and produce power more consistently. In a scorching climate, consider parking so the battery compartment is on the shaded side of the RV or add a small vent fan. An overheating inverter might go into thermal shutoff, so keep cooling fins and fans clear of dust and don’t stack gear around the inverter.
2) Battery Care in High Heat
🔋 Heat is the enemy of battery life. High temperatures can accelerate corrosion and evaporate electrolyte fluid in batteries, which shortens their lifespan. In summer, check your batteries more frequently:
- 💧 Flooded batteries: You may need to add distilled water more often in hot weather. Wear eye protection and gloves, and only fill to the recommended level.
- 🧊 All battery types: Keep them as cool as possible. If your RV is in storage with no climate control, removing batteries to a cooler indoor spot can prolong life (more practical for off-season if not using the RV).
- 🛠️ Temperature compensation: Ensure the charge controller has temp compensation so it reduces charge voltage in high heat to avoid overcharging. High temps can make batteries reach full at a slightly lower voltage; compensation prevents pushing them too hard.
3) Avoid Overcharging
🧠 If your RV will sit in the sun for extended periods, make sure your solar charge controller is a reliable 3-stage (or MPPT) unit that will go to float and not continuously overcharge the batteries. A healthy controller prevents overcharge, but if you ever notice batteries “boiling” or venting (flooded types) or getting excessively hot, that’s a red flag. In an emergency (controller failure), disconnect or cover the panels to stop charging. Some owners in long-term storage disconnect the panels once batteries are full, then reconnect periodically to top off—especially if they don’t have a top-tier controller. Bottom line: a little monitoring goes a long way; check on the rig every few weeks during summer storage.
4) Shield Your Panels (if idle)
🛡️ While solar panels are built for sun and weather, if your RV will sit for months, consider using panel covers or tarps during the hottest weeks. This can slightly reduce heat aging and prevents the system from constantly cycling your batteries if you’re not around. If you do cover panels, remember to uncover them when you need the system active (or if a battery maintainer relies on solar).
5) General Off-Season Checklist
- 🔋 Batteries: Decide whether to leave them in place on a maintainer or remove for separate storage. Either way, give a full charge and/or keep on a smart charger. Disconnect the negative cable if leaving in the RV to eliminate parasitic draws.
- ⚡ Panels & Controller: If batteries are removed, disconnect or cover the panels. If batteries remain, double-check controller settings and log battery voltage so you can confirm it’s maintaining charge. Turn off or disconnect the inverter if you won’t use AC—no need to draw idle power.
- 🧽 Inspect & Clean: Storage time is perfect for a thorough inspection. Clean the panels, check wiring and mounts, and fix any issues now to avoid surprises later.
- 🪟 Ventilation: Leave vents open or install vent covers if possible to avoid heat build-up inside the RV that could affect electronics and warm your batteries more than desired.
✅ By following these summer and storage best practices, you’ll protect your RV solar system from the extremes of heat and inactivity. Many steps are “set and forget”—once prepped, the system should happily take care of itself while you’re away. When you return, everything will be in good shape and your solar power will be ready to roll. 😎
Troubleshooting Common RV Solar System Issues
🛠️ Even with great maintenance, you might occasionally run into quirks or issues with your RV solar setup. Maybe the panels don’t seem to be charging the battery, or your battery isn’t holding a charge as long as it used to. Perhaps your inverter is beeping with an error code, or you just feel like the system is underperforming. Don’t worry – this section will help you troubleshoot common RV solar system issues in a logical, step-by-step way. Safety first: if you’re checking electrical components, turn off power or cover the panels (so they aren’t live) and use proper precautions (insulated tools, no metal jewelry, etc.). Now, let’s dive into the typical problems and how to fix them.
Issue 1: Solar Panels Not Charging the Battery
🔎 Symptoms: You notice that your battery level isn’t rising even on sunny days, or the solar charge controller is not indicating any incoming charge. Perhaps the battery % is slowly dropping despite good sun, meaning your panels aren’t charging at all or the charge is very weak.
🧭 Possible Causes: Several things can prevent solar panels from charging your RV’s batteries effectively:
- 🌳 Shading: Even a small amount of shade on a panel (from a tree branch, roof vent, AC unit, etc.) can dramatically cut its output. If your panels aren’t charging, the first step is to inspect for shade or debris on them. Remember that shadows move with the sun – a spot that was sunny in the morning might be shaded by afternoon. Solution: Park in a sunnier location or trim back overhanging branches if you can. Keep panels clean of dirt and debris which can mimic shading by blocking light.
- 🔌 Loose or Disconnected Wiring: A common culprit for “no charging” is a loose wire or poor connection somewhere in the system. A single disconnected connector or a wire that has vibrated loose can open the circuit. Inspect all the wiring from panels to controller – are the MC4 connectors tight? Is the fuse between panels and controller intact? Are the controller’s terminals clamped down on the wires? Tighten any loose connections and replace blown fuses. Sometimes a wire may have pulled out of a crimp or gotten damaged, so look for any obvious breaks. If you have a multimeter, you can test the panel output directly in sunlight to verify it’s producing voltage.
- 📟 Faulty Charge Controller: If the panels and wiring check out, the solar charge controller could be at fault. Controllers can fail or blow an internal fuse, especially cheaper models. Check the controller’s display lights or screen – is it showing any sign of life? Any error codes? If it appears “dead” or unresponsive, it may not be allowing charge through. Try resetting the controller (many have a reset procedure, or you can disconnect it from all power, wait, and reconnect). Also, measure the input voltage from the panels at the controller – if you see proper voltage going in, but nothing coming out to the battery, that points to a controller issue. Before replacing, double-check settings (like battery type and charge voltage) – a controller in the wrong mode can appear not to charge.
- 🪟 Damaged Panels: Though less common, it’s possible a solar panel itself has failed or been damaged. Hail, flying road debris, or manufacturing defects can cause panel cracks or internal faults. Inspect the panels for visible cracks, burn marks, or discoloration. If one panel in a series string goes bad, it can bring the whole array’s output down. Use a multimeter to check each panel’s open-circuit voltage (Voc) in sun. If one panel reads significantly lower than expected (e.g., 0 volts), it’s likely failed and needs replacement.
✅ By methodically checking for these causes – shade, connections, controller, and panels – you can usually pinpoint why the battery isn’t charging. In many cases, the solution is simple (move out of the shade or tighten a loose wire). Once resolved, you should see your charge controller happily pumping current into your batteries again. ☀️
Issue 2: RV Battery Not Holding Charge / Draining Too Fast
🔋 Symptoms: Your RV batteries are not lasting as long as they used to. You charge them up (via solar or plugging into shore power), but they drop to low voltage quickly, even under normal use. You might find yourself needing generator or shore power more often because the solar can’t keep up with the battery drain. In severe cases, the battery might not reach full charge at all.
😣 This issue can be especially frustrating when you’re trying to enjoy a boondocking trip. Common causes include:
1) Aging or Damaged Batteries
The most frequent reason for a battery that won’t hold a charge is simply age. Over time, batteries lose capacity – even the best ones. If your battery bank is a few years old (lead-acid typically 4–6 years max, unless high-quality; lithium maybe 10 years but it depends on cycle count), it might be nearing the end of its life. One or more cells could be weak or sulfated. Solution: Load test your batteries. Many auto parts stores can do this, or you can use a battery load tester. If the battery fails a load test or is significantly underperforming, it’s time for a replacement. Replacing an old battery will often instantly fix your “capacity” issues. (Tip: If you have multiple batteries and one fails, consider replacing them as a set if they’re the same age, to avoid imbalance.)
2) Improper Charging (Chronic Under or Overcharging)
Batteries that are consistently undercharged (never brought to 100%) can develop sulfation, which reduces capacity. Conversely, overcharging (too high voltage for too long) can cause battery damage as well. Check that your solar charge controller is configured to the correct battery type and voltage settings. For example, if you installed AGM batteries but the controller is set for flooded, it might be overcharging them. Or if it’s set too low, the batteries might never get full. Solution: Adjust settings to match manufacturer recommendations (usually in your battery manual or spec sheet). Ensure the controller is reaching absorption and float stages properly. If you frequently fully discharge your batteries, consider adding more battery capacity or charging sources so you’re not stressing them as hard – deep discharges shorten battery life.
3) Loose or Corroded Connections
Just as with charging issues, if the battery connections are loose or corroded, you might not actually be getting a full charge into the battery. Or, the power might not be efficiently delivering to your RV loads, making it seem like the battery is “dying” when in reality the power can’t get through. Solution: Clean and tighten all battery contacts (see the maintenance section). This ensures you’re measuring true battery performance and not losing energy in transit.
4) Parasitic Loads / Phantom Drains
Your battery might actually be fine, but something in your RV could be draining it faster than expected. Parasitic loads like propane/CO detectors, fridge control boards, stereo memory, alarm systems, or other electronics that run in the background can add up. Over a few days, these small draws can significantly pull down a battery. Solution: When troubleshooting, disconnect or turn off as many things as possible and see if the battery holds charge better. Use a multimeter (amps setting) to measure any draw from the battery when everything is “off”. If you find a considerable draw (more than a few tenths of an amp) that you can’t account for, try pulling fuses one by one to identify the circuit. Once you know the cause, you can address it (maybe a light is staying on, or a device can be switched off or put on a separate cutoff). Installing a battery disconnect switch can also help ensure nothing drains the battery when you store the RV.
5) Temperature Effects
This ties in with seasons – extreme heat or cold can make a battery seem weak. In cold weather, capacity is temporarily reduced (a cold battery can feel “empty” even if it’s charged, because the chemistry is sluggish). In hot weather, capacity is fine but self-discharge is faster and overall life shortens. If you experience poor performance mainly in winter, it could be the temperature – once the battery warms up, it will behave normally again. Solution: Mitigate temperature if possible (insulate or warm batteries in winter, ventilate in summer). Temperature-related capacity loss is usually reversible (the battery isn’t permanently damaged; it just needs a better environment).
6) Inverter or Device Inefficiencies
Sometimes the issue isn’t the battery at all, but how power is being used. For instance, if you have an inverter on 24/7, it draws power even with no load (some inverters can draw a substantial idle current). Or a fridge might be cycling more than you expected. Do an energy audit to ensure that your daily power usage isn’t simply exceeding what your solar and batteries can supply. If it is, you either need to scale up the system or scale back the usage.
✅ In summary: if your RV batteries aren’t holding charge, first verify the health of the batteries themselves. If they check out, then examine how they’re being charged and used. Often, a tired battery or an unnoticed constant load is to blame. With either a battery replacement or some tweaks to your setup (and habits), you can get back to a situation where the batteries hold strong through the night. For more detailed info on battery types and care, our RV Battery Comparison and maintenance sections (above) are great resources. 💡
Issue 3: Inverter Not Working or Charge Controller Error Codes
⚠️ Symptoms: You might encounter a scenario where the inverter (which provides AC power from your batteries) doesn’t turn on or isn’t delivering power to your outlets. It could be completely dead, or maybe it powers on but immediately beeps or shuts down when you try to run something. Alternatively, your solar charge controller might be flashing an error code or showing a fault icon on its display, indicating something is wrong in the system.
🧭 These issues can be a bit technical, but here’s how to approach them:
Inverter Has No Power / No Output
- 🔌 If your inverter appears to be off (no indicator lights or anything) or on but not outputting AC, check the simple things first. Is the inverter getting power from the batteries? A blown fuse or tripped circuit breaker between the batteries and inverter can cut power. In many RV inverter installations, there’s a large fuse (like a Class T fuse or ANL fuse) on the positive cable, or a breaker, which protects against shorts. If you accidentally over-stressed the inverter (like a short or overload), that fuse may have blown. Solution: locate and test that fuse – replace it if blown (with the same amperage rating).
- 🕹️ Also ensure the inverter’s built-in power switch is actually turned on (it sounds obvious, but it happens!).
- 🔧 Next, look at the inverter’s cables – are they securely attached and not corroded? Inverters draw high current; a loose cable could cause voltage drop or shutdown. Tighten any loose battery/inverter connections.
- ♻️ Finally, many inverters have internal protections – if it overheated or experienced an overload, it might need a reset. Some have a reset button or require being turned off and back on. Consult your inverter’s manual for any special reset or internal fuse.
Inverter Overheating or Cutting Out
- 🌡️ Inverters can overheat if run at high load for a while or if they’re in a hot or unventilated space. Symptoms include the inverter suddenly shutting down when powering heavy loads, or its cooling fan running constantly and loudly.
- 🌀 Solution: Ensure the inverter has plenty of airflow. Don’t store gear around it that blocks ventilation holes. In hot weather, you might even point a small fan at it or open the compartment door.
- ⚡ Also check that you’re not exceeding its continuous power rating – running a 1500W appliance on a 1000W inverter, for example, will overload it and cause shut off.
- 🛠️ If the inverter consistently runs hot even under moderate load, there could be an internal issue or calibration problem, and you may need a technician’s help or a replacement.
Charge Controller Error Codes
📟 Modern solar charge controllers often display error codes or blink lights to signal issues. Common error codes might indicate things like over-voltage, under-voltage, or over-current. For example, an “over-voltage” error could mean the solar panel input voltage is too high for the controller (perhaps a panel got wired incorrectly or a surge), or the battery was overcharged. An “under-voltage” or low battery alarm means the battery fell below a safe level – the controller might shut off output to protect the battery. Over-current could indicate too much solar coming in (more than the controller can handle) or a short circuit somewhere. Solution: The first step is always to consult the controller’s manual for the specific error code. The manual will tell you what the code means and often suggest corrective actions.
- 🔺 If it’s battery over-voltage or under-voltage, check your battery condition and wiring. A sudden over-voltage could mean a battery got disconnected while charging (so the controller had nowhere to put the power). Under-voltage means your batteries are very low – maybe the solar isn’t keeping up or you discharged too much – in that case, charge the batteries from another source if you can, or reduce loads and let solar catch up.
- 🔆 If it’s over-current (or over-temperature for the controller), perhaps too many panels are connected. Verify that your solar array is within the controller’s specs. Also ensure proper ventilation for the controller – like inverters, controllers can heat up if processing a lot of power, and most are designed to limit output or shut down if they overheat.
- ⚙️ If it’s an internal error code (some controllers might show codes for internal failures or firmware issues), try resetting the controller. Power it down (disconnect solar input first, then battery – reversing that when turning back on) to see if the fault clears. If not, contacting the manufacturer or technical support might be necessary.
General Controller/Inverter Troubleshooting
- 🔄 For both inverters and controllers, sometimes the simplest fix is a system reboot. Turn off/disconnect your inverter, cover your solar panels (or turn off the controller if it has a switch), then disconnect the battery for a few minutes. Reconnect and see if the error clears or the inverter works.
- 📝 Also, take note of any error messages or blinking patterns – write them down to reference. If you have internet access, searching the specific model and error code can often bring up helpful discussions or manuals.
✅ In summary, inverter and charge controller issues require a bit of detective work: check the hardware (fuses, connections, ventilation) and interpret any error messages. In many cases, it’s either an external issue (blown fuse, overheated unit) you can fix, or the device alerting you to a condition in the system that needs attention (like low battery voltage). With patience and referring to your product manuals, you can solve most of these issues on your own. And if not, a call to the product’s customer support can guide you – they deal with these questions all the time.
Issue 4: Solar System Underperformance (Not Meeting Expectations)
😕 Symptoms: You have solar power, but it just doesn’t seem to be as much as you expected. Perhaps your panels are rated for a certain wattage, but you rarely see that output. Or your batteries take longer than expected to charge, or you run out of power sooner than you think you should. Essentially, the RV solar system works, but the performance is underwhelming.
This is a broad issue because it could be perception (expectations vs reality) or something actually limiting the system. Let’s cover the common factors:
🧽 Dirty or Dusty Panels
Even a thin film of dust or grime can cut solar panel output significantly. If you haven’t cleaned your panels in a while, try giving them a good wash (as described earlier). Dirty panels are one of the top causes of underperformance. In dusty environments, panels might need cleaning every few weeks. After cleaning, you might immediately notice more charging current on the controller display.
🌤️ Sun Angle and Placement
Fixed flat panels on an RV roof will rarely produce their full rated output except under ideal conditions (strong midday sun, cool temps). If the sun is at a low angle (morning, late afternoon, or winter), the effective output is lower. Also, if your RV is parked in a less-than-ideal orientation, your panels may not get peak sun. Solution: Whenever feasible, park to optimize sun exposure—e.g., noontime sun hitting panels as directly as possible. Using portable panels or tilt brackets can also boost performance by angling toward the sun.
🌳 Partial Shading
Partial shading (even a small portion of a panel) can dramatically reduce power due to how panel cells are wired. An unnoticed shadow from an antenna or even a roof rack can limit output. Try to observe your panels throughout the day to catch any sneaky shadows. If you find any, see if you can reposition the object or the RV. Sometimes even relocating a TV antenna or moving a cargo box can improve solar exposure.
🔥 High Temperatures
Solar panels are rated at standard test conditions (77°F/25°C). In very hot weather, panels actually produce less power because high temperatures reduce their voltage output. So on a 100°F day, even with full sun, you might see 10–15% less output than on a cooler day. Ensure some airflow under panels. This behavior is normal—panels love light, but not heat. When things cool down, efficiency goes up again.
📊 System Sizing vs. Usage
Sometimes an “underperforming” system is actually an undersized system. If your daily usage is higher than what your solar + battery setup can supply, it will feel weak but is simply being asked to do too much. For instance, running a residential fridge, a laptop, and a fan might consume more Ah in a day than a single 100W panel can replenish. Solution: Revisit your power audit and solar system sizing (see our [RV Solar Sizing Guide]). You may need to add another panel or more battery capacity, or manage consumption—especially on cloudy days.
🔁 Battery Acceptance
If the system starts charging strong in the morning but the current tapers off quickly, your batteries may be in the absorption phase and can’t take full panel power. This is normal once batteries reach about ~80% full—your charge controller will throttle back to top them off. It can look like the panels “aren’t working,” but it’s actually a good sign. To capture excess solar, add daytime loads (charge laptops, etc.) while ensuring evening reserve remains adequate.
🔌 Inverter Inefficiency
If your reference point is AC appliance usage, remember the inverter has losses (typically 5–15%). A 100W light might draw ~110W from the battery. Where possible, use 12V DC directly (LED lights, fans, phone charging) to reduce conversion losses and stretch your stored solar energy.
🧩 Potential Equipment Issues
There could be an actual fault—e.g., a partially failing panel that still works but at reduced output, or an MPPT charge controller that isn’t tracking properly. If you suspect a panel issue, test each panel’s current in full sun (compare short-circuit current to spec). For the controller, confirm firmware and settings. These are less common—rule out simpler factors first.
✅ In many cases, what feels like underperformance can be solved with cleaning, better positioning, and a realistic understanding of your system’s capacity. Track your power production and usage over a few days—you may find patterns (e.g., always low by morning because a fridge draws overnight).
📈 One more tip: Using a battery monitor (or your controller’s app) shows watts produced vs state of charge. This data is invaluable for pinpointing whether the limitation is on the charging side (panels) or the consumption side (loads/batteries). Armed with this info, you can adjust intelligently.
💬 Lastly, if you’re ever in doubt, seek advice. Online forums and user groups are full of experienced RV solar users who’ve seen and solved the same issues. With a bit of tweaking—or a thoughtful upgrade—you can squeeze more efficiency from what you have.
Conclusion: Keep Your Solar System Shining for the Long Haul
🔧 Maintaining and troubleshooting your RV solar system might seem like a lot to take in, but once you break it down into routine habits and periodic checks, it becomes second nature. A little effort in preventative maintenance – like cleaning panels, tightening connections, and caring for your batteries – pays off with a reliable power supply and peace of mind on the road. Remember, an RV solar setup is a long-term investment in your travels, and looking after it ensures you get the maximum benefit in return.
✅ By following this guide, you’ll catch small issues before they become trip-ending problems. No more arriving at a beautiful remote campsite only to find your panels aren’t charging or the batteries are dead. Instead, you’ll have confidence that your system is in great shape, season after season. And if something does go wrong, you now have the knowledge to troubleshoot common solar issues yourself, safely and effectively – whether it’s a mysterious error code or a battery that’s acting up.
🌞 Safe and happy travels, and may your journeys be filled with ample sunshine and worry-free solar power! With regular checks and a bit of TLC, your RV solar system will keep running smoothly, allowing you to focus on the fun of the adventure. Here’s to many years of off-grid exploring with the comfort and convenience that a well-maintained solar setup provides. Happy solar camping! 🔆🚐