SureCall Fusion2Go 3.0 RV Cell Signal Booster Deep-Dive: Real Owner Patterns, Install Tricks, and Dealbreakers
Affiliate Disclaimer: This article contains affiliate links. If you click through and make a purchase, I may earn a small commission at no extra cost to you. This helps support my deep-dive research.
Quick Summary (TL;DR)
I went through a large spread of owner feedback on the SureCall Fusion2Go 3.0 RV cell signal booster, and the big takeaway is simple: this product is wildly outcome-dependent.
- When it works, it’s a legitimate “we can finally call/text/hotspot inside the rig” fix—especially for metal-heavy RVs and camper vans that behave like rolling Faraday cages.
- When it doesn’t, it can feel like a $300–$450 blinking paperweight (often because of band compatibility, antenna placement, or what looks like plain old unit-to-unit reliability variance).
- The indoor coverage is usually tight. Many owners describe best results within a few feet of the inside antenna, and a common workaround is treating it like a “signal station” for your phone/hotspot.
Confidence Score: 6.2/10
(Just over half of the owner ratings land in 4–5 stars, but a very large chunk are 1-star “no improvement” reports—so I trust the principle of the kit, but I don’t trust it to be plug-and-play for everyone.)
If you want to see current pricing on the kit: Check price on Amazon
The Real RV Signal Problem Isn’t “No Bars”—It’s “No Usable Connection”
If you’ve ever pulled into a beautiful boondocking spot and watched your phone flip between one bar, SOS, and “no service,” you already know the pain isn’t just social media. It’s maps that won’t load, weather alerts that don’t come through, two-factor login codes that never arrive, and that moment when a quick call turns into “can you hear me now?” on repeat.
That’s why I dug deep into real owner experiences with the SureCall Fusion2Go 3.0 RV cell signal booster—not marketing vibes. What matters in an RV is setup reality: antenna placement, carrier bands, how far you can actually be from the inside antenna, and whether the thing still behaves after months of bouncing down the highway.
What follows is the practical, buyer-first version—so you can make a decision without burning your return window.
What the SureCall Fusion2Go 3.0 Actually Is (In Plain English)
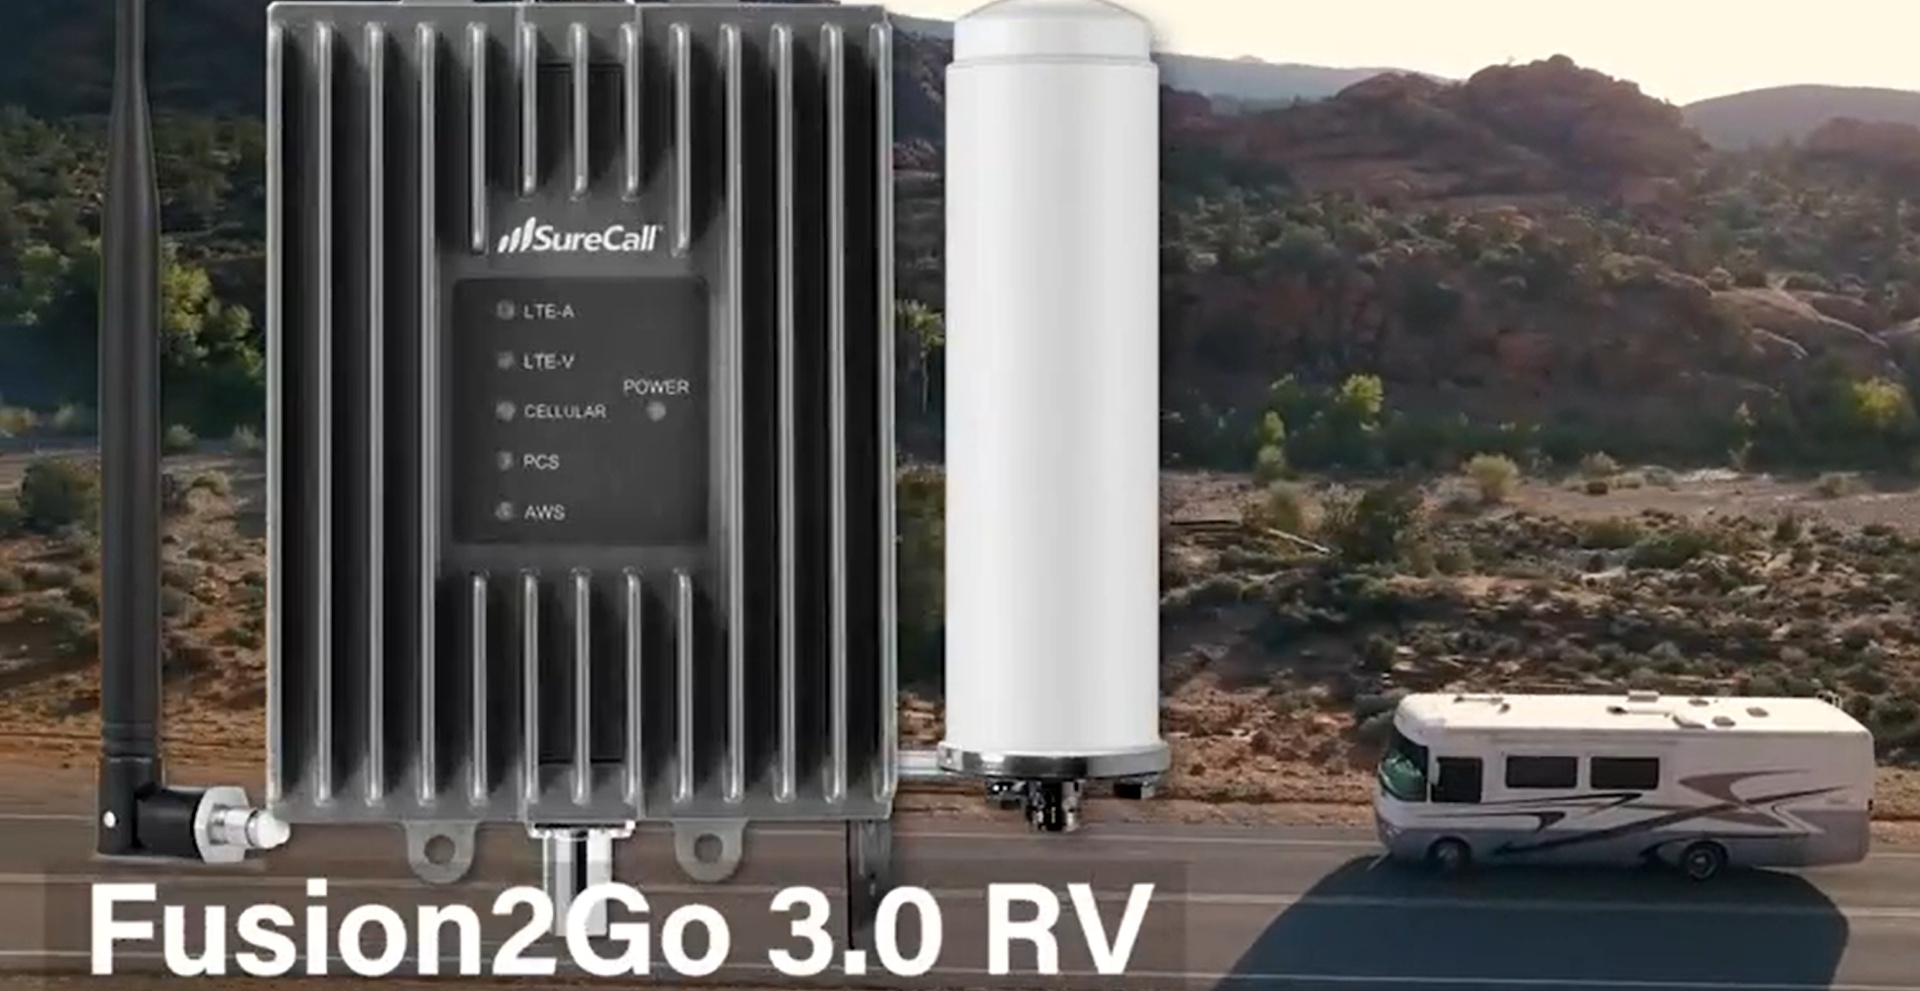
At a high level, an RV booster kit like this is a two-antenna relay system:
- Outside antenna (donor antenna) grabs whatever weak signal exists outside your rig.
- Amplifier/booster unit strengthens that signal.
- Inside antenna rebroadcasts it inside the RV so your phone/hotspot has something usable to connect to.
This is important: a booster can’t invent coverage where there’s truly none. Across the owner feedback I analyzed, a recurring theme is that the kit shines when you have some signal outside—even if it’s weak—and your RV construction is killing it inside.
What Makes This Kit “RV-Specific” (Based on What Owners Actually Mention)
Owners repeatedly talk about this kit like it’s designed to be flexible for different rigs because it typically comes with:
- Multiple antenna options (owners mention more than one inside antenna style, and more than one outside antenna style)
- Two power options (a 12V plug for vehicle power and an AC wall adapter)
- Longer cabling that can reach across larger RV layouts
- Status lights on the amplifier that are supposed to indicate normal operation
The build quality impressions are also consistent in the positive reviews: people describe the amplifier as sturdy (often noting a metal housing) and the hardware as “well made.”
But that’s only the front half of the story—because the back half is where outcomes split hard.
The Installation Reality: It’s Usually Not Hard… But Placement Is Everything
One pattern that comes up repeatedly is that owners who got meaningful results treated antenna placement like the whole game—not a minor detail.
Typical install time (real-world)
Several owners describe installs around an hour-ish for a motorhome or trailer, especially if they already have a ladder mount option and a clean cable-routing path.
The “RV-length” factor
Owners with longer rigs (including big motorhomes and fifth wheels) mention that cable length can be “just enough” or comfortably workable—especially when routing along slide edges or running front-to-back separation.
The two placement rules that decide success
Based on aggregated owner experiences discussed in these reviews, the two rules that matter most are:
- Get the outside antenna high and clear (ladder, roofline, or a raised mast when parked).
- Separate the outside and inside antennas as far as practical (often rear outside / mid or front inside).
If you violate separation, boosters can downshift performance or behave inconsistently (some owners describe confusing light behavior that doesn’t match real improvement).
How I’d Install It (Step-by-Step, Owner-Informed)
Use this as a practical checklist—especially if you want to avoid the “all green lights, zero improvement” situation.
- Choose the outside antenna mount
- Ladder mount is common for travel trailers and motorhomes.
- Some owners get better results by raising the antenna when stationary (pole/mast strategy).
- Pick an interior “signal zone”
- Decide where you actually need signal: dinette workspace, bedroom, or near your hotspot/router location.
- Route the cable with RV-safe habits
- Avoid pinch points at slide seals.
- Keep bends gentle.
- Secure the run so vibration doesn’t loosen connectors over time.
- Mount the amplifier where it can breathe
- Don’t bury it in a sealed cavity that traps heat.
- Keep it accessible for quick reboots and troubleshooting.
- Place the inside antenna with realistic expectations
- In real-world use, many users find the best boost happens within a few feet of the inside antenna.
- If you want shareable internet, plan for a “phone/hotspot station” setup.
- Power up and test the right way
- Don’t rely on bars alone. If you can, check signal strength (dBm) on your phone.
- Test before/after with the booster on and off from the same spot.
- Fine-tune before you drill anything permanent
- Several owners recommend experimenting with placement first—because the difference between “worth it” and “worthless” can be a few feet.
Key Features Breakdown (What It Promises vs. What Owners Lived)
Here’s the buyer-useful version of the common features owners talk about—without the marketing fog.
| Feature | What the Manufacturer Says (Simplified) | What It Actually Means (User Experience) | Compared to Competitors (Owner-Referenced Only) |
|---|---|---|---|
| Multi-band signal boosting | “Works with major U.S. carrier signals” | Results vary heavily by carrier/band. Some owners report strong Verizon/AT&T improvements; others report no benefit on certain T-Mobile scenarios. | A few owners who tried other popular boosters report similar “depends on location/band” behavior, while at least one said they returned another kit and preferred this one. |
| Multiple inside antenna options | “Flexible install for different rigs” | Many owners gravitate to the flat/panel-style inside antenna for stability and predictable placement; some dislike “mast” style antennas that can be awkward in small spaces. | One owner explicitly preferred the extra included antenna options compared to a competing kit they bought. |
| Long cable runs + RV mounting | “Designed for RV layouts” | Cable length is often described as workable even in longer rigs, which helps with proper antenna separation (rear outside / front or mid inside). | Most RV kits try to solve this, but owners specifically praised the practicality of the cable run on this kit. |
| Status lights / “smart” operation | “Easy, optimized automatically” | Owners report the lights can be misleading: you can see “normal” indicators and still experience no real improvement, which drives frustration. | Some competing kits are described as simpler, but not necessarily more effective. |
| Dual power (12V + AC) | “Use it on the road or plugged in” | Owners like having both options. The 12V approach is especially RV-friendly for travel days. | Not all kits emphasize both power options equally; owners call this a practical inclusion. |
Step 5: Real-World User Experience Analysis (Deep Pattern Analysis)
This is where the SureCall Fusion2Go 3.0 RV story becomes very clear: owners tend to fall into one of two camps.
Pattern A: “It turned my RV from dead-zone to usable”
In the reviews I went through, I kept seeing success stories that look like this:
- Outside signal exists (even weak).
- RV interior signal is much worse than outside (metal shells, aluminum trailers, vans).
- After install, owners report:
- more stable calls/texts
- better hotspot reliability
- enough consistency to stream (in some cases)
A few owners even describe improvements in terms of “bars gained,” and one detailed reviewer talks about measurable signal strength jumps when positioned correctly.
What these owners did differently:
They treated the inside antenna range as limited and built their routine around it—phone close, hotspot near the antenna, and careful separation.
Pattern B: “It did nothing—multiple trips, multiple locations”
Owners commonly report another outcome:
- They install it correctly (at least in their view).
- The booster shows “normal” lights.
- Their phone experience stays the same:
- no extra bars
- calls still drop
- data still crawls
What’s especially painful here: some owners tested across multiple trips and locations, hoping it would eventually “click,” and then realized too late they missed the return window.
Pattern C: “It works… but only if the phone is basically hugging the inside antenna”
A frequent buyer surprise is how often people mention proximity:
- Several owners describe a major jump only when the phone is right next to the inside antenna (or even touching it).
- That sounds annoying—until you frame it correctly.
The practical workaround that keeps showing up:
Treat the inside antenna like a docking point:
- Put your phone on/near the inside antenna.
- Enable hotspot.
- Let your laptop/TV run off the phone’s improved connection.
This is not how people want to use an RV booster, but it’s how a noticeable subset of successful owners make it work reliably.
Pattern D: Carrier/band compatibility can be a hard stop
From real-world owner feedback, it looks like band support matters more than most people expect.
Multiple reviews explicitly mention:
- Certain LTE band limitations
- A mismatch between what a user’s service operates on and what the booster supports
- Specific services that users were told are incompatible (or didn’t improve in real use)
This is the “silent dealbreaker” that explains a lot of 1-star outcomes that otherwise look like mystery failures.
CTA: If you’re leaning toward buying, here’s the cleanest next step: Check price on Amazon—but don’t skip the “Who should skip it” section below.
The Good, The Bad & The Ugly (Pros/Cons Box)
Pros (When conditions are right)
- Can make weak outside signal usable inside the RV (calls, texts, basic data)
- Works especially well for metal-heavy rigs where outside is better than inside
- Flexible kit: multiple antennas and power options are repeatedly appreciated
- Cable length and mounting practicality get real praise from RV owners
- Some owners report meaningful, measurable improvements when placement is dialed in
Cons (The dealbreakers owners hit)
- Highly inconsistent outcomes: a large portion of owners report zero improvement
- Indoor coverage is often limited—you may need to stay within a few feet of the inside antenna
- Compatibility/band issues can make the booster effectively useless for some setups
- Instructions/manual frustration: some owners describe the guidance as thin, which increases trial-and-error
- Reliability variance: a few owners report multiple unit failures or “dead” behavior
Owner Stories (The Human Side)
These aren’t quotes—just the real-life scenarios that show what ownership feels like.
Story 1: The “aluminum RV cage” win
One owner installed the system in an aluminum-bodied trailer where indoor signal was basically a joke. Their first attempt didn’t impress—until they worked with support, replaced the unit, and suddenly the kit behaved the way they expected. The catch: indoor performance was best when they treated the inside antenna area like their “connectivity corner,” especially for laptop/hotspot use.
If you want to browse more real buyer experiences like this, start here: See the Amazon review page
Story 2: The return-window regret
Another owner tried it on multiple trips across different months and locations, expecting the booster to eventually show value. After repeated “no change” outcomes, they realized they waited too long and couldn’t return it. Their advice was blunt: if it doesn’t help early, don’t keep gambling on future trips.
Story 3: The “it works, but only if I use it this specific way” workaround
A handful of owners describe the same discovery moment: the booster can produce a big jump, but it’s strongest when the phone is very close to the inside antenna. Once they accepted that, they used a practical hack—phone near the antenna as the hotspot source—then let everything else connect to that phone.
This is the story that turns the kit from “annoying” into “useful,” but it’s also the story that makes some people return it immediately.
Expert Tips & Installation Hacks (The Stuff That Isn’t Obvious at First)
Here are the most useful “pro tips” I pulled from repeated owner behavior:
- Do a zero-drill test run first
- Before you commit to a permanent roof entry or hard mount, test placement with temporary routing.
- Several owners found the difference between “nothing” and “wow” was pure placement.
- Use height strategically when parked
- A raised outside antenna (mast/pole strategy) can be the difference-maker in fringe areas.
- This is especially useful if your camping style is boondocking or rural parks.
- Plan your inside antenna around your hotspot routine
- If you work from your dinette, mount/place the inside antenna near that seat.
- If you stream from a TV area, consider how your hotspot device will live near the inside antenna.
- If you see “normal” lights but feel no improvement, test proximity
- A quick diagnostic: see whether the phone improves when it’s very close to the inside antenna.
- If yes, your next move is repositioning for practical use—not assuming it’s broken.
- Protect your electronics
- One owner noted losing a unit to a power event. In an RV, power can be messy—especially at older parks.
- For more RV-specific electrical protection and prevention, these are worth reading:
Who This Is For (And Who Should Skip It)
Buy the SureCall Fusion2Go 3.0 RV cell signal booster if…
- You often camp in places where you have weak-but-real signal outside, but it collapses inside your rig.
- Your RV/van has a lot of metal (and you suspect it’s blocking signal).
- You’re willing to do basic testing and repositioning to dial it in.
- You’re okay with a “connectivity zone” concept (inside antenna area = best performance area).
If that’s you, here’s the product link again: Check price on Amazon
Skip it if…
- You regularly camp where there is truly no coverage from any carrier.
- You expect whole-RV blanket coverage like a Wi-Fi router.
- You don’t want to think about LTE bands / compatibility at all.
- You’re buying primarily for a specific service type that owners repeatedly report as incompatible or inconsistent.
“If Not This, Then What?” (Practical Alternatives Inside Your RV)
If your real goal is stable internet—not just better phone bars—boosting is only one piece of the puzzle.
A lot of RVers end up combining:
- cellular (boosted or unboosted)
- a better router setup
- and/or satellite internet
If you want to build that kind of layered setup, these guides help:
Deep-Dive FAQ
Does this booster work if I have zero bars?
In real-world use, many users find the answer is effectively no. If there’s no usable signal outside for the donor antenna to grab, there’s nothing meaningful to amplify.
How close do I need to be to the inside antenna?
A noticeable subset of owners describe best results within a few feet—and some report the strongest jumps when the phone is extremely close to the inside antenna. If you want to use hotspot reliably, plan your setup around that reality.
Will it work with Verizon, AT&T, or T-Mobile?
Owners report mixed results:
- Some describe strong improvements on Verizon and AT&T scenarios.
- Others describe no improvement in certain T-Mobile situations, and a few specifically point to band/frequency mismatches as the reason.
The buyer-smart move is verifying what bands your device/service actually uses in the places you camp most.
Why do I have “normal” lights but no real improvement?
Owners commonly report this exact frustration. The most common explanations (based on repeated patterns) are:
- antenna placement (separation and height)
- indoor antenna positioned too far from where you actually use your phone/hotspot
- band compatibility mismatch
- unit variance/defect (a few owners report replacements that suddenly worked)
What’s the single best troubleshooting step?
Before you move mounts or drill holes: test proximity. If the phone improves only when it’s close to the inside antenna, your path forward is placement and workflow design (hotspot station). If there’s no improvement even close-up, you may be looking at compatibility, environment, or a bad unit.
Final Verdict: A Legit Tool—But Not a Safe Blind Buy
Here’s my honest conclusion after going through the owner experiences:
The SureCall Fusion2Go 3.0 RV cell signal booster can absolutely solve the right problem—weak outside signal + RV signal-killing construction—and some owners are genuinely thrilled with what it enables.
But the failure rate in owner-reported outcomes is too significant for me to call it a universal recommendation. If you buy it, buy it like a tester: install carefully, validate with real measurements or repeatable tests, and don’t let the return window slip while you “hope it starts working later.”
If you’re ready to roll the dice (smartly), here’s the link: Check price on Amazon