The Ultimate RV Toilet Buying Guide: What Owners Wish They’d Known
Last updated: June 2026
Editor’s Note: This guide is based on a deep-dive synthesis of real owner feedback and long-term usage patterns. We cut through marketing to focus on what actually changes outcomes.
🎯 Already know what you need? Jump straight to our tested recommendations in the 10 Best RV Toilets (Tested Picks) list.
The Toilet Nobody Thinks About Until It’s Failing at 2 a.m.
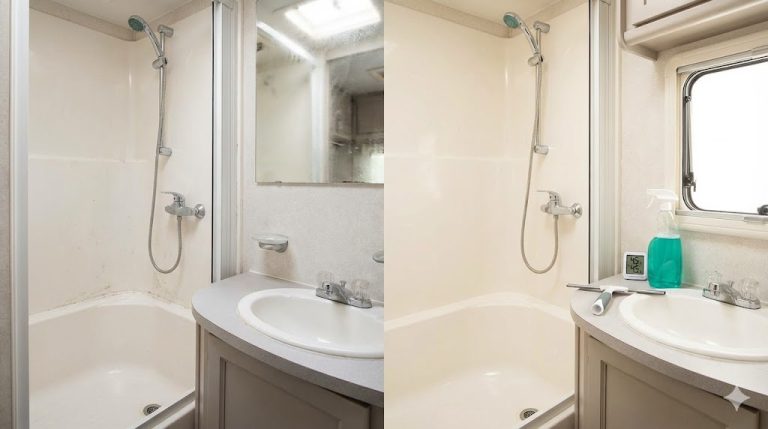
The RV toilet is the one fixture you ignore until it betrays you. The factory unit flexes when you sit on it. It pushes black-tank odor back into the cabin no matter how much treatment you dump in. The flush pedal cracks, the bowl quietly stops holding water, or it simply arrives at your door with a shattered lid inside a perfectly intact box.
If any of that sounds familiar, you’re not imagining it. The same handful of frustrations show up again and again, across budget plastic units, ceramic upgrades, portable cassettes, and composting setups alike. The pain is real, and most of it is predictable.
Here’s the big takeaway before you spend a dollar: the toilet that makes someone miserable and the toilet that makes someone thrilled are frequently the same model. The difference is almost never luck alone. It’s whether the buyer matched the unit to their rig, their water pressure, their climate, and their tolerance for maintenance — and whether they tested it on their own setup before the return window slammed shut.
That’s the lens this guide uses. We read through a large body of owner experiences across the major RV toilet types, separated genuine product failures from setup-and-expectation mistakes, and kept only the patterns that repeated. What follows isn’t a spec recap — it’s the behavioral map of where this category goes right and wrong.
Quick Summary: The Fast Verdict
The Golden Rule: Match the toilet to your constraints — rig plumbing, water pressure, climate, and how much maintenance you’ll actually tolerate — then prove it works on your setup before the return window closes. Almost every horror story traces back to skipping one of those steps.
5 Questions to Ask Before Buying
- Where and how does my water line enter behind the existing toilet — straight down from the floor, or horizontally out the back?
- Do I run a water pressure regulator at every hookup, or am I feeding campground pressure straight into a plastic valve?
- Am I matching a fixed footprint (flange-to-wall clearance and bolt pattern), or do I need a self-contained portable unit with no plumbing at all?
- Am I willing to do basic seal and gasket maintenance, or do I genuinely need “install once and forget it”?
- Will I open and fully inspect the unit the day it arrives, even if I won’t install it for weeks?
The “Don’t Do This” Warning: Don’t order a toilet ahead of camping season and let the sealed box sit in the garage for weeks. The single most painful outcome in all the feedback is an owner who opened a “perfect” box long after delivery, found a cracked bowl or lid, and discovered the return window had already closed. The return clock does not pause for your project timeline.
Owner Pattern Index (Fast Diagnosis)

Use this to recognize what owners are actually describing when something goes sideways — and where to look first before you assume the toilet is defective.
| What owners complain about | What it usually points to | What to check first |
|---|---|---|
| Bowl slowly stops holding water; odor creeps into the bathroom | Worn flush-ball seal or O-ring, sometimes the inlet valve | Inspect and replace the ball/flapper seal before suspecting anything bigger |
| Drips or running water at the foot pedal or base after a few months | Plastic pedal/valve assembly fatiguing under pressurized water | Address the pedal gasket early; don’t over-stomp the pedal |
| Valve “popped,” then water runs continuously or stops entirely | Internal fill/flush valve failure, often accelerated by high pressure | Confirm a pressure regulator is installed at the hookup |
| Persistent smell in a portable or composting unit | Skipped chemical (cassette) or urine crossing into solids (composting) | Verify treatment use, fill technique, and continuous venting before blaming the seal |
| Leaks onto the floor from a portable unit on a slope or when full | Filler-cap seal, overfill, or steep tilt — often situational, not a defect | Test with plain water level and overfilled; check the cap seal |
| Looks perfectly fine, flushes great on day one — then fails inside the first year | The misleading “honeymoon” unit: a seal or pedal already stressed but not yet leaking | Run multiple flushes and a live overnight water-hold test before trusting it |
| Arrived in a pristine box but the bowl, lid, or hinge is cracked | Shipping damage hidden by intact outer packaging | Open and inspect the day it lands, photograph everything |
Return-Window Test Protocol (Do This Before You Toss the Box)
The whole point of this protocol is to surface a defect or a mismatch while you can still get a refund — and at least one test has to prove the unit behaves under real conditions, not just sitting parked and dry.
| Time window | Test | Pass looks like | Fail looks like | What to do next |
|---|---|---|---|---|
| The moment it arrives | Open the box fully; inspect bowl, lid, hinge, and included parts | No cracks; seal, bolts, and any advertised accessory present | Hairline cracks, shattered ceramic, missing seal or sprayer | Photograph the box and unit, start a return through your seller immediately |
| Before install | Dry-fit in the actual space; check flange-to-wall clearance or cabinet dimensions | It sits level and clears the wall/cabinet on all sides | Inlet hits a thin wall, unit is wider/taller than expected | Add a 90° elbow or flexible line, or return if the footprint won’t fit |
| First connection | Run water through several flushes; watch the base and pedal | Strong rinse, clean shutoff, no drips anywhere | Weak stream, continuous run, drips at base or pedal | Re-seat connections and seals; if it persists, treat as a defect |
| Live overnight (real conditions) | Fill the bowl, leave it sealed overnight; for portables, run the actual flush pump repeatedly and tilt with plain water | Bowl still holds water in the morning; pump cycles and shuts off; no leak on tilt | Bowl drained overnight; pump runs on or won’t prime; water escapes on a slope | This is your true keep-or-return signal — a unit that won’t hold water or pump reliably now won’t fix itself later |
| Across the window | Confirm color, version (electric vs. manual), and parts match what you ordered | Everything matches the listing | “White” arrived as bone; got the electric version you didn’t want | Return for the correct variant rather than living with the wrong one |
1. Pick Your Lane (Risk vs. Convenience)
Before features, pick the type. Each lane trades something real.
| Lane | Who it’s for | What you give up |
|---|---|---|
| Fixed gravity toilet (plastic or ceramic, bolts to flange, ties into black tank) | Owners with existing RV plumbing who want a near-residential experience and a true swap | You inherit the black-tank routine, water-pressure sensitivity, and flange/inlet fitment puzzles |
| Portable cassette toilet (self-contained, no plumbing, carry-and-dump) | Vanlifers, boat, cabin, tiny-house, and backup users who want no hookups | You commit to chemical discipline, a dumping routine, and parts that can be pricey or scarce |
| Composting / urine-diverting dry toilet (waterless, two-stream) | Off-grid setups where escaping the black tank entirely is the whole point | You take on technique-dependent diversion, a hands-on cleanout, and a higher upfront price |
2. The “Boring” Stuff That Matters
The unglamorous checks below are exactly what separate a fifteen-minute swap from a half-day ordeal.
- Water inlet orientation. This single detail ruins more fixed-toilet installs than anything else. Many newer units feed straight down from the floor, while older RV toilets fed horizontally out the back. Verify yours before ordering.
- Flange-to-wall clearance and footprint. “High profile” and rear-inlet designs can clash with thin RV walls. Measure before you commit.
- Water pressure. For fixed gravity toilets, unregulated campground pressure is the quiet killer of plastic valves. A regulator is non-negotiable.
- Cabinet dimensions for portables. A frequent surprise is that a comfortable cassette unit is bigger and heavier — especially full — than the photos suggest. Measure width, depth, and height, then add margin.
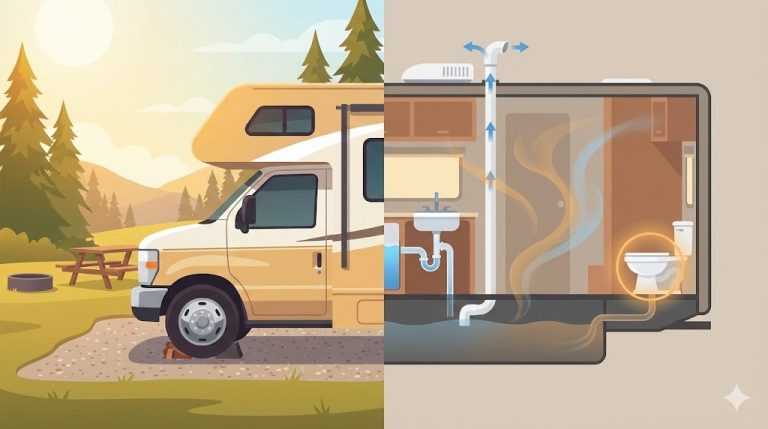
- Climate and venting for composting units. Humidity without serious airflow planning turns a “smells like soil” unit into a “smells like a porta-potty” unit.
Common regret pattern: buying on comfort and color alone, then discovering on install day that the water line doesn’t reach, the unit won’t clear the wall, or the cabinet is an inch too tight.
Install-day surprise scenario: An owner replacing a 10-to-15-year-old fixed toilet assumes it’s a drop-in. The footprint matches perfectly — but the new unit’s inlet points down at the floor while the rig’s line comes out the back wall. Now it’s a mid-install trip to the hardware store for a swivel braided supply line and adapters, when ten minutes with a phone camera beforehand would have caught it.
For the broader power-and-plumbing picture that surrounds any fixed install, the RV electrical safety fundamentals and the guide to choosing and using a water pressure regulator are worth reading first — because, as the next sections show, pressure is directly tied to whether a gravity toilet survives or fails.
Compatibility Matrix (What Owners Say Actually Fits)
These are owner-reported patterns, not a spec sheet — the families below come up repeatedly enough across feedback to be worth flagging.
| Model / Family (as referenced by owners) | Common install/fitment notes owners mention | Noise sensitivity notes | Recurring failure or complaint theme | Best prevention step owners learned |
|---|---|---|---|---|
| Dometic 300 / older builder-grade plastic (the unit being replaced) | Frequently the “before” toilet; flexes and smells with age | Slams and rattles on rough roads when the lid lacks soft-close | Worked-in odor between inner/outer bowl; general flex | Treat it as the baseline to upgrade away from |
| Thetford Aqua-Magic (Style II and residence-style ceramic) | Often a near-direct swap on matching footprints; kit usually includes seal and bolts | Soft-close lid is liked; quiet when new | Plastic flush pedal cracking or dripping; grooved seat hard to clean | Treat the pedal gently, keep a spare ball seal, plan a possible seat swap |
| Dometic 310 (porcelain, standard height) | Easy swap especially for Dometic 300 upgraders | Soft-close seat praised; quiet flush | Bowl won’t hold water (ball seal); “white vs. bone” color mismatch | Service the flush-ball seal early; confirm color before ordering |
| Budget all-plastic fixed (SEAFLO-style) | Often installs in well under an hour when the inlet orientation matches | Soft-close lid praised for no midnight slamming | Internal fill/flush valve failure past the return window | Install a pressure regulator; register warranty the day it arrives |
| Premium cassette (Porta Potti 565-series) | Bigger/heavier than photos; measure the cabinet | Quiet electric flush when working | Electric pump failure after storage; pricey, scarce parts | Choose the manual-pump variant for reliability, or pull batteries in storage |
| Composting / urine-diverting (Nature’s Head-style) | Doesn’t arrive ready to use; adapter and vent cover often bought separately | Continuous fan must run and vent outside | Urine crossing into solids; hard-to-reach crevices; humid-climate odor | Sit forward and aim deliberately; vent outside 24/7; keep medium on the dry side |
3. Real-World Performance: What Actually Happens?
| Marketing claim | Owner reality |
|---|---|
| “Easy drop-in replacement” | Easy when the inlet orientation and flange match; fiddly fast when they don’t |
| “Durable, long-lasting build” | Mostly true, but a recurring subset reports valve/pedal/seal failures past the return window |
| “No odor” | True with the right chemicals (cassette) or correct venting and diversion (composting); skip those and odor becomes the top complaint |
| “Leak-proof” | Solid for most; a repeated minority reports cap or seal leaks on tilt or when full |
| “Backed by warranty” | Coverage exists but often hinges on prompt registration or authorized sellers; follow-through draws frequent criticism |
Polarizing split #1 — the same fixed toilet, loved and cursed. One owner does a like-for-like ceramic swap, finishes in minutes, and would buy it again without hesitation. Another is on their third unit in three years because the plastic pedal keeps cracking. The bowl held up fine for both — the difference is the pedal mechanism under pressurized water and how hard it gets stomped. Buyers who treat the pedal gently and run a pressure regulator land in the happy camp far more often.
Polarizing split #2 — the composting toilet’s odor verdict. Half of owners say there’s simply no sewage smell and it beats their black tank by a mile. The other half describe a sour, wet mess. The dividing line is remarkably consistent: continuous outside venting plus deliberate urine diversion technique versus a weak or unvented fan in a humid climate. Same unit, opposite experiences, driven almost entirely by setup and habits.
A quick definitional note, since “composting” is a loaded word: many owners point out these units don’t truly compost with daily use — you empty a dry, odor-managed holding chamber, not finished compost. For broader public-health context on how human waste should be handled and disposed of, the CDC’s guidance on sanitation and hygiene is a sound baseline. Treat it as background, not a performance claim about any specific toilet.
4. The Setup: Where Most Failures Happen
Most “bad toilet” stories are really setup stories. Here’s the success pattern owners converge on:
- Before removing the old toilet, photograph exactly where and how the water line enters.
- Keep a 90° elbow, a flexible/swivel supply line, and common adapters on hand as cheap insurance.
- Wrap inlet threads with PTFE tape, a few clockwise turns, to reduce connection leaks.
- Use the included bolts and seal, not your old ones — owners note the difference matters.
- Set the toilet, sit on it to compress the seal, then tighten evenly. Don’t overtighten plastic.
- Run several flushes and watch the base and pedal before you call it done.
- For portables, add chemical from the very first use; for composting units, budget for the adapter and vent cover up front and vent outside continuously.
Misread Risk: Owners frequently assume a weak or inconsistent flush means a defective toilet, when the real culprit is low or fluctuating water supply pressure feeding the unit. Before condemning the toilet, rule out the system. If you’re chasing weak flow, the low water pressure troubleshooting walkthrough can save you an unnecessary replacement.
The one step owners skip: Installing and using a water pressure regulator at every hookup. Many campgrounds run pressure higher than RV plumbing comfortably tolerates, and that excess pressure is repeatedly tied to accelerated valve failures in fixed gravity toilets. It’s the single most impactful, lowest-effort thing you can do to extend a toilet’s life — and it’s the step that, when skipped, quietly drives a chunk of the return-and-complaint stories.

RV TOILET: SYSTEM PROBLEM vs PRODUCT PROBLEM — DECISION TREE

START: What's the symptom?

[1] Bowl won't hold water / odor creeping in
      -> Likely cause: flush-ball seal or O-ring worn
      -> Confirm check: replace the ball seal first
      -> If fixed -> seal was the problem (normal wear)
      -> If NOT fixed -> suspect the inlet/flush valve (bigger job;
         verify against manufacturer guidance or a qualified RV tech)

[2] Weak or inconsistent flush
      -> Likely cause: SYSTEM water pressure, not the toilet
      -> Confirm check: test supply pressure at the hookup;
         confirm a regulator is installed and the line isn't restricted
      -> If pressure is low/erratic -> fix the system (regulator, line, pump)
      -> If pressure is fine -> suspect the toilet's rinse path

[3] Drips / running water at the foot pedal or base
      -> Likely cause: pedal/valve gasket fatigue
      -> Confirm check: identify source — base seal vs pedal/valve area
      -> Re-seat flange seal; tighten gently; address pedal gasket early
      -> If it keeps running or worsens -> valve assembly (verify with tech)

[4] Valve "popped," then continuous run or no water
      -> Likely cause: internal fill/flush valve failure
      -> Confirm check: was a pressure regulator in use?
      -> If NO regulator -> high pressure likely accelerated it; add one
      -> Treat as a product failure; pursue warranty with your records

[5] Portable unit leaks onto the floor
      -> Likely cause: filler-cap seal, overfill, or steep tilt (often situational)
      -> SWAP TEST: move the unit to a level spot and refill to a normal level.
         Does the leak follow the unit, or did it only happen on the slope/when full?
      -> Follows the unit on level ground -> seal/cap defect
      -> Only on tilt or when overfilled -> setup issue, not a defect

[6] Composting unit smells / solids stay wet
      -> Likely cause: venting or diversion technique, not the build
      -> Confirm check: is the fan running 24/7 and vented OUTSIDE?
         Is urine staying out of the solids chamber?
      -> Fix venting + technique first; only then question the unit
How to validate a new RV toilet before the return window ends
Prove it works on your rig while you can still get your money back.
- DO: Run multiple flushes plus a live overnight water-hold test (and, for portables, cycle the real pump and tilt with plain water).
- WATCH: A bowl that drains overnight, a pump that runs on or won’t prime, or any drip at the base or pedal.
- IF-FAIL: Treat it as a defect now — document it and return it rather than hoping it settles in.
Fitment checks that prevent install-day surprises
Five minutes with a phone camera beats a half-day and a hardware-store run.
- DO: Photograph the water-line entry point and measure flange-to-wall clearance (or cabinet dimensions for portables) before ordering.
- WATCH: An inlet that points down when your line comes from the back, thin walls, or a footprint bigger than the photos suggest.
- IF-FAIL: Pick up a 90° elbow and a flexible supply line as insurance, or choose a better-matched model before committing.
When it’s a system problem vs a product problem
Rule out your rig before you blame the toilet.
- DO: Test supply pressure and run a swap test — does the issue follow the part or the position?
- WATCH: Weak flush with low pressure (system), or a leak that follows the unit onto level ground (product).
- IF-FAIL: Fix the system first (regulator, line, pump); if the fault follows the unit, pursue a seal/valve repair or warranty.
5. Reliability & Support: The Hidden Cost
The reliability story in this category is less about a single bad model and more about variance. Most owners of any given unit report quiet, years-long, trouble-free use. A recurring minority hits early valve, pedal, pump, or seal failures — often with no easy way to predict which group they’ll land in. Quality control variance is real, and it’s why so much of this guide is about testing early and stacking the deck in your favor.
Support experiences mirror that variance. When manufacturer support engages, owners describe fast callbacks, shipped replacements, even pre-shipment testing. When it doesn’t, they describe unanswered emails, “just buy a new unit” responses, and being bounced between seller and manufacturer. The friction is inconsistent rather than uniformly bad — which is exactly why documentation matters so much.
Your buyer-protection plan:
- Open and inspect the unit the day it arrives; photograph the box, the unit, and the install.
- Register the warranty immediately if registration is required — missing the window can forfeit coverage.
- Keep your order receipt and buy from a reputable, authorized seller.
- Keep a spare seal (and, for cassettes, know where pump parts come from) before you need it.
Expectation reset: Even a genuinely good RV toilet can’t guarantee permanence. Across every type, the seals, gaskets, flush pedals, and pumps are consumable wear parts, not lifetime components. A fixed toilet’s ball seal will eventually need replacing; a cassette’s pump is a finite-life electromechanical part; a composting unit demands ongoing technique and cleaning. “Good,” in this category, means predictable and serviceable — not maintenance-free. Going in with that boundary set is the difference between a minor chore and a sense of betrayal.
6. Pre-Purchase Checklist (Save This)
- [ ] Photographed the water-line entry point and orientation behind the existing toilet
- [ ] Measured flange-to-wall clearance (fixed) or cabinet width/depth/height (portable)
- [ ] Confirmed which toilet type fits my setup (fixed gravity / cassette / composting)
- [ ] Verified I run a water pressure regulator at every hookup (fixed units)
- [ ] Confirmed the correct color and version (e.g., electric vs. manual) before ordering
- [ ] Have a 90° elbow, flexible/swivel supply line, and PTFE tape on hand
- [ ] Bought from a reputable, authorized seller and saved the receipt
- [ ] Planned to open and inspect the unit the day it arrives
- [ ] Know the warranty registration requirement and deadline (if any)
- [ ] Have (or know how to get) a spare seal and any pump/parts
- [ ] For portables: budgeted for chemical and RV-friendly toilet paper from day one
- [ ] For composting: budgeted for the power adapter, vent cover, and continuous outside venting
7. Who Should Buy What? (Buyer Personas)
The Weekender
- Needs: A comfortable, low-fuss toilet for occasional trips; easy install; forgiving of light maintenance.
- Avoid: Anything that demands heavy ongoing technique or constant venting for short, intermittent use.
The Full-Timer
- Needs: Maximum long-term durability, serviceable wear parts, and a setup they can repair on the road.
- Avoid: Budget units with valve-failure patterns past the return window, and any toilet they can’t keep spare seals or parts for.
The Budget Hunter
- Needs: The most usefulness per dollar; willing to do basic maintenance and follow fill/storage technique to the letter.
- Avoid: Expecting premium-brand reliability and always-available parts at budget pricing — and skipping the pressure regulator that protects the cheaper valve.
FAQ (Data-Backed Answers)
What’s the single most important thing to do when my new toilet arrives?
Open the box and fully inspect the bowl, lid, hinge, and included parts the day it lands — even if you won’t install it for weeks. The most painful outcomes in all the feedback came from damage discovered after the return window had already closed.
Why does my bowl keep losing water?
The most common cause owners report is a worn flush-ball seal or O-ring; replace that first. If a fresh seal doesn’t fix it, suspect the inlet/flush valve, which is a bigger job best verified against manufacturer guidance or handled by a qualified RV tech.
Electric or manual flush on a portable cassette toilet?
If convenience is your priority and you’ll test and maintain it, the electric version is lovely to use. If long-term reliability matters more, owner feedback leans consistently toward the manual pump — fewer electronics to fail, especially after winter storage.
Will a new fixed toilet just drop into my RV?
Often the footprint matches, but the rear water-line orientation and wall clearance are where installs go sideways. Photograph the inlet and measure clearance before ordering; a 90° elbow or flexible supply line resolves most mismatches.
Do composting toilets really avoid the sewage smell?
For owners who vent the fan outside continuously and divert urine carefully, yes — many say it beats a black tank outright. In humid climates with weak or unvented airflow, owners report the opposite. Setup and technique drive the result more than the brand.
How long should one of these last?
It varies widely. Plenty of owners report years of trouble-free use; a frustrated minority hits pedal, pump, valve, or seal wear within a year or two. Treating mechanisms gently, running a pressure regulator, and servicing seals early all improve your odds.
Is the warranty worth counting on?
Coverage exists but is inconsistent in practice, and it often hinges on prompt registration or buying from an authorized seller. Register immediately, keep your records, and don’t assume support will be fast.
What to Re-Check Before You Buy (Listings Change)
Owner reports surface the same listing-era surprises again and again, so verify these right before you order:
- Color mismatch: Ordering “white” and receiving “bone” is a recurring frustration on at least one popular model. Confirm the actual color shipped.
- Version drift: Electric versus manual flush, or high-profile versus low-profile height, can hide behind nearly identical photos. Confirm the exact variant.
- Missing parts: Some buyers expected an included hand sprayer (fixed units) or a power adapter and vent cover (composting units) and didn’t get them. Don’t assume — check the in-box contents.
- Condition concerns: Pristine outer boxes have hidden cracked bowls and lids. Inspect on arrival regardless of how the packaging looks.
Printable Cards (Save These)
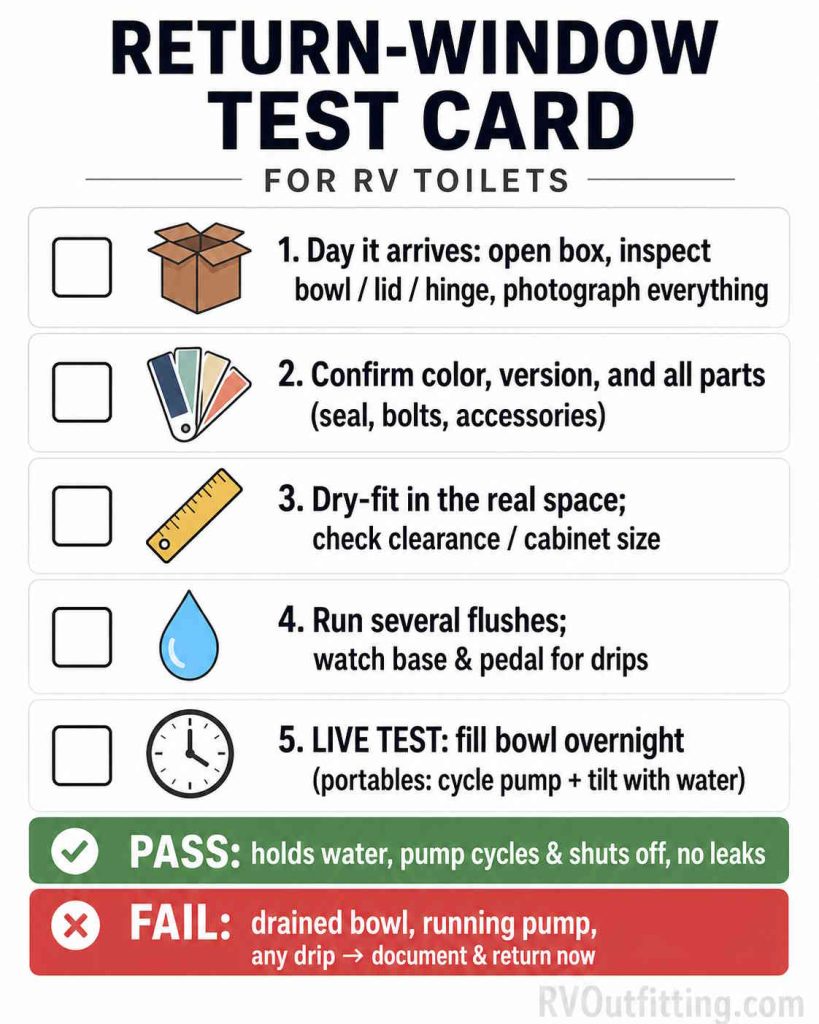
Return-Window Test Card
- Day it arrives: open the box, inspect bowl/lid/hinge, photograph everything
- Confirm color, version, and that all parts (seal, bolts, accessories) are present
- Dry-fit in the real space; check clearance or cabinet dimensions
- Run several flushes; watch the base and pedal for drips
- LIVE TEST: fill the bowl overnight (and cycle a portable’s pump + tilt with plain water)
- Pass = holds water, pump cycles and shuts off, no leaks
- Fail = drained bowl, running pump, any drip -> document and return now

RV Toilets Problem Decision Card
- Won’t hold water? -> Replace the ball seal first -> still failing? suspect the valve
- Weak flush? -> Check SYSTEM pressure + regulator before blaming the toilet
- Drip at pedal/base? -> Identify source, re-seat flange seal, address gasket early
- Valve popped / runs on? -> Was a regulator in use? Add one; pursue warranty
- Portable leaks? -> SWAP TEST: does it leak on level ground or only on tilt/when full?
- Composting smell? -> Fan running 24/7 and vented outside? Urine staying out of solids?
- When unsure beyond a basic seal/gasket swap -> verify with manufacturer or a qualified RV tech
Update Log
- June 2026: Rebuilt the Owner Pattern Index and Return-Window Test Protocol around the recurring “won’t hold water,” pedal-failure, and shipping-damage themes.
- June 2026: Added the System vs Product decision tree with a swap test for portable leaks, plus the pressure-regulator “one step owners skip.”
- June 2026: Expanded the composting and cassette guidance to reflect long-term venting, technique, and electric-pump patterns.
Final Verdict
There’s no single “best” RV toilet — there’s the right lane for your rig and habits, and the discipline to prove the unit out before the return window closes. Pick your lane first: a fixed gravity toilet if you have the plumbing and want a residential feel, a portable cassette if you want freedom from hookups, or a composting unit if escaping the black tank is the whole point. Then protect your choice with a pressure regulator, careful fitment, immediate inspection, and a live test on your own setup.
That’s the Golden Rule, restated: match the toilet to your constraints, then verify it on your rig before the window closes. Do that, and almost every horror story in this category becomes a problem you simply never have.
Ready to choose a specific model? We’ve ranked the top performers based on these criteria. See the top picks: 10 Best RV Toilets Reviews