How to Unclog an RV Toilet (Safe Fixes + Poop Pyramid)
Last updated: February 2026
If your RV toilet is clogged, this guide walks you through how to diagnose the problem fast, unclog it safely without damaging your system, and prevent it from happening again.
Quick Answer: 2-Minute Triage (Toilet vs Tank vs Vent)
Before you grab tools or pour anything down the bowl, figure out what kind of problem you actually have. Most RVers waste time (and money) treating the wrong thing. Use these symptoms to route yourself to the right fix.

Start with symptoms (what you see right now)
Quick-Start Triage Checklist
- Bowl is full and won’t drop → You likely have a toilet throat or line clog. Jump to the Pipe/Line Clog section below.
- Toilet “burps,” gurgles, or drains slowly with weird airflow → This points to a vent problem. Check the Vent Branch section under “When It Looks Like a Clog (But Isn’t).”
- Tank gauge reads “full” but behavior doesn’t add up → Your sensors may be lying to you. Sensor misreads are extremely common and mimic clog symptoms.
- Black tank won’t drain at the dump station → Think compacted tank, blocked outlet, or a stuck knife valve. Route to the Compacted Tank fix path.
- Recurring clogs after every dump → Almost always a prevention-habit issue (valve practice, water use, TP choice). Head to the Prevention section.
- Electric or macerator toilet acting up → These need their own caution path. See the Special Cases section before trying anything.
Safety-first starting rule (lowest-risk first)
Always start with safe, low-risk fixes before moving to anything aggressive. Boiling water can crack plastic components. Harsh chemicals can destroy seals and kill beneficial bacteria in your tank. The methods in this guide are ordered from safest to most aggressive for exactly that reason.
What You’ll Need (Only the essentials)
You don’t need a garage full of specialty tools to handle most RV toilet clogs. Here’s what actually shows up in the fix paths below.
Core tools (from dossier)
Tool Checklist
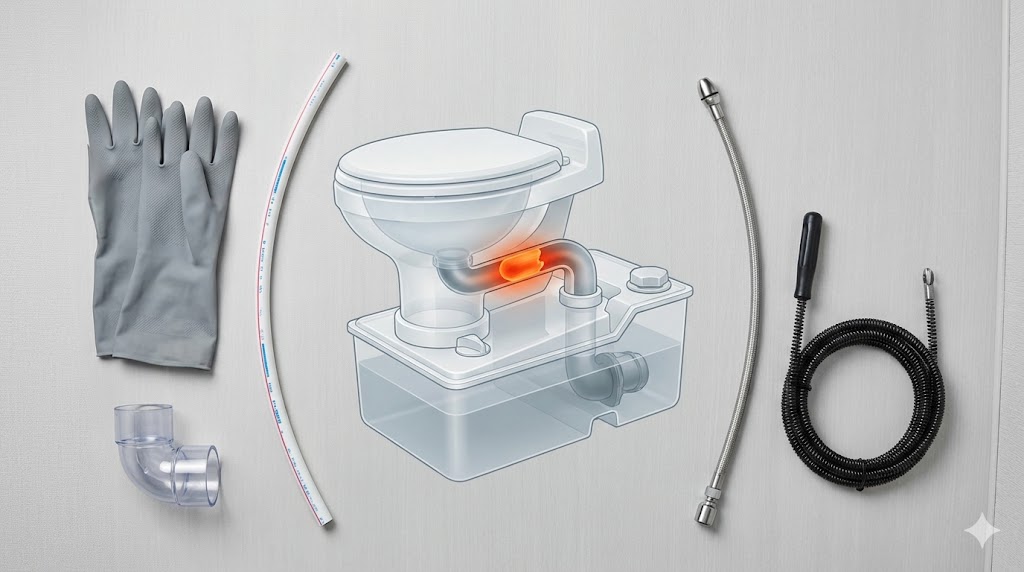
- ½-inch PEX pipe (~5 ft) — flexible enough to navigate the toilet throat and break up blockages
- Rinser wand / tank wand (garden hose attachment) — for flushing and agitating the tank interior
- Clear sewer elbow / transparent adapter — lets you visually confirm whether waste is flowing during a dump
- Toilet snake / plumbing auger — for stubborn pipe or line clogs
- Garden hose + shut-off valve (DIY setup) — gives you a controllable water source for flushing and rinsing
Helpful products (from dossier)
Several clog-specific treatments and maintenance products come up repeatedly across experienced RVer recommendations:
- Clog treatments: Unique Clear-It, Unique RV Digest-It Plus Ultra, Happy Campers, Camco TST, Thetford Aqua-Bio, Thetford Aqua-Max
- Seal care: Thetford Seal Lubricant & Conditioner, Danco Plumber’s Grease — keeping your flush ball or blade seal lubricated helps prevent buildup and sticking
Safety gear
Rubber gloves and eye protection are strongly recommended any time you’re working around black tank waste. You’re dealing with sewage — treat it accordingly.
Safe Fixes — Start Here (Before you “go nuclear”)
Resist the urge to start with the most aggressive method. These low-risk steps resolve a surprising number of clogs on their own, and they won’t damage your toilet or tank.
Add hot water the safe way (when bowl is full)
If the bowl is full and nothing will go down, start by carefully adding 1–2 gallons of hot (not boiling) water. The heat and volume help soften and loosen whatever is blocking the throat or line.
⚠️ Do not use boiling water. Boiling water can warp plastic toilet components, crack seals, and damage the flush ball or blade. Use hot tap water — hot enough to dissolve buildup, not hot enough to melt anything.
Let the hot water sit and work for a while, then try flushing. If the water level drops even slightly, you’re making progress.
Visual diagnosis at the dump connection
One of the most underrated diagnostic tools is a clear sewer elbow or transparent adapter at your dump connection. When you open the valve, you can actually see whether waste and water are flowing freely or if the line is restricted. This simple visual check saves a lot of guesswork.
If you have a built-in black tank flush port
Many newer RVs come with a dedicated black tank flush port on the exterior. This is different from a tank treatment (chemicals/enzymes you add through the toilet) and different from a deep clean (a thorough rinse-and-treat cycle you do periodically). The flush port lets you spray water directly into the tank to break up buildup. If your rig has one, use it as part of your safe-fix sequence before escalating.
Identify Your Clog Type (The 3-Path Classifier)
Not all clogs are the same, and using the wrong fix for the wrong clog wastes time or makes things worse. Authoritative guides consistently separate RV toilet clogs into three distinct categories.
| Feature | Type A: Pyramid Plug | Type B: Pipe/Line Clog | Type C: Compacted Tank/Outlet |
|---|---|---|---|
| Where it forms | Inside the black tank, building upward from the bottom | Toilet throat, offset pipe, or drop tube | Tank interior, outlet, or knife valve |
| Key symptom | Slow drain, tank fills fast, valve-open history | Bowl full and won’t drop at all | Tank won’t drain at dump station |
| First safe approach | Rehydrate + treat + soak | PEX pipe or toilet snake | Clear elbow diagnosis + soak/treat |
Type A — Pyramid plug (poop pyramid / TP pyramid)
A pyramid plug forms when solid waste builds up in a cone shape inside the black tank, usually because the tank valve was left open. With the valve open, liquids drain away continuously, leaving solids behind to dry, stack, and harden. Over time, this pyramid grows tall enough to block the toilet outlet from above.
Type B — Pipe/line clog (blocked toilet line / throat)
This is the classic “bowl is full and nothing moves” situation. The blockage sits somewhere between the toilet bowl and the tank — in the toilet throat, an offset pipe section, or the drop tube. It’s often a wad of toilet paper, a foreign object, or built-up residue narrowing the passage.
Type C — Compacted tank / outlet clog
When your black tank won’t drain at the dump station, the problem is usually at or near the bottom: compacted waste filling the tank floor, a blocked outlet, or a knife valve that isn’t opening fully. This is different from a pipe clog because water can still enter the tank from the toilet — it just can’t leave.
How to Clear Each Type of Clog (Step-by-step, safest first)
Now that you know which type you’re dealing with, follow the matching fix path. Each one is ordered from safest to most aggressive.
Fix Path for Pyramid Plug
A pyramid plug is all about rehydration. The waste has dried out and hardened, so you need to get water and chemistry back into contact with it.
Step-by-step: Pyramid Plug Reset
- Close the black tank valve if it’s currently open. This is non-negotiable — you need liquid to stay in the tank.
- Add 3–5 gallons of warm water through the toilet. This begins rehydrating the dried mass.
- Add your chosen tank treatment (Unique Clear-It, Happy Campers, Camco TST, etc.) per the product’s directions.
- Let it sit for a minimum of 12 hours. Ideally, give it 48 hours or more. The longer the treatment soaks, the more the pyramid softens.
- Use pulsed rinse cycles if you have a tank flush port: run water for 30–60 seconds on, then 30 seconds off. This agitation helps break the mass apart without over-pressurizing.
- Check progress with a clear sewer elbow when you dump. You should see waste flowing more freely with each cycle.
- Repeat if needed. Stubborn pyramid plugs may require multiple soak-and-dump cycles.
Prevention callback: The number-one cause of pyramid plugs is leaving the black tank valve open at full-hookup sites. Current consensus is clear — keep it closed and only open to dump when the tank is sufficiently full.
Fix Path for Pipe/Line Clog
When the blockage is between the bowl and the tank, you need to physically break it up or push it through.
Step-by-step: Pipe/Line Clog
- Try the PEX pipe method first. Insert a ½-inch PEX pipe (roughly 5 feet long) carefully through the toilet opening. The flexibility lets it navigate bends while applying enough pressure to break through a soft clog.
- Work it gently. Push, rotate, and wiggle — but don’t force it. You’re trying to break the blockage apart, not ram it deeper.
- Follow up with hot water (1–2 gallons, not boiling) to flush loosened material into the tank.
- If the PEX pipe doesn’t work, try a toilet snake or plumbing auger. Use one designed for toilets to minimize the risk of scratching or cracking the bowl. Work slowly and keep the tool centered.
On plungers: Using a plunger on an RV toilet is controversial. Some experienced RVers say a flange plunger works fine for pipe clogs. Others warn that plunging can damage seals or push waste into places it shouldn’t go. If you try one, use it gently and watch for leaks afterward.
Fix Path for Compacted Tank / Outlet / Knife Valve Issues
Before committing to aggressive fixes, make sure the problem is real.
Step-by-step: Compacted Tank / Outlet
- Rule out a sensor false positive. If your tank gauge reads “full” but you haven’t used the toilet much, the sensors may simply be coated with residue. This is one of the most common misdiagnoses in RVing.
- Use a clear sewer elbow at the dump connection. Open the valve and watch. No flow at all? You have a genuine outlet or valve blockage.
- Check the knife valve. A knife valve (gate valve) can fail mechanically — the blade may not retract fully, or waste and paper can catch on the track, preventing a clean opening.
- If confirmed blocked: Close the valve, add warm water and a clog-specific treatment through the toilet, and let it soak. Repeat the soak-and-dump cycle, checking with your clear elbow each time.
Special Cases — Macerator & Electric Toilets (Dometic/Thetford notes)
If your RV has a macerator or electric-flush toilet, the rules change. These systems have pumps, motors, and components that are more sensitive to the wrong fix methods.
Can macerator RV toilets clog?
Yes. Macerator toilets grind waste before sending it to the tank, but they’re not immune to clogs. Foreign objects, excessive toilet paper, or dried buildup can still cause blockages — and when they do, the macerator pump itself is at risk.
“Safe vs risky” for macerators
⚠️ Default warning for macerator and electric toilets: Do not use harsh chemicals or boiling water. These can damage pump seals, impellers, and electronic components far more easily than in a standard gravity-flush toilet.
Common RV toilet models fall into two broad categories:
- Gravity-flush models (e.g., Dometic 300, 310, 320; Thetford Aqua-Magic V, Style II) — these follow the standard fix paths above
- Macerator/electric models (e.g., Dometic macerator units; Thetford Aria, Bravura) — these need gentler methods and often model-specific guidance
If you own a macerator or electric toilet and encounter a clog that doesn’t respond to warm water and gentle treatment, consult your owner’s manual before escalating. Model-specific steps vary, and what works on a gravity toilet can damage an electric one.
When It Looks Like a Clog (But Isn’t)
Some of the most frustrating “clogs” aren’t clogs at all. Before you spend hours snaking a line that isn’t blocked, rule out these common mimics.
Are your sensors lying to you?
Black tank sensors are notorious for giving false “full” readings. Residue, grease, and toilet paper cling to the sensor probes, making the gauge read full even when the tank is mostly empty. If your gauge says full but the toilet flushes normally and waste flows at the dump station, your sensors — not your plumbing — are the problem.
Vent branch (toilet vs tank vs vent triage)
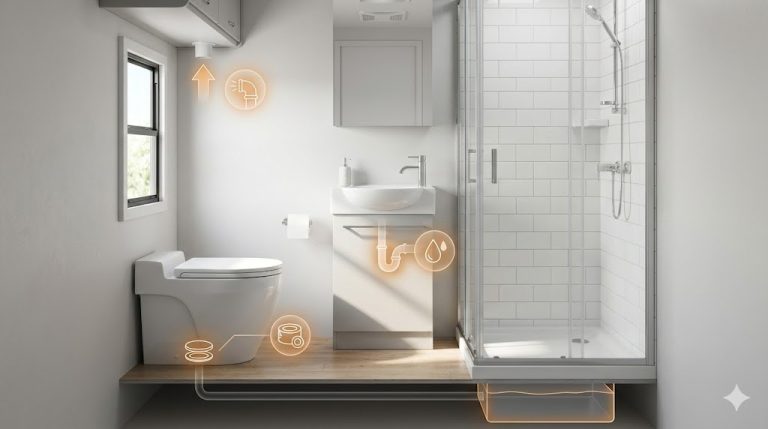
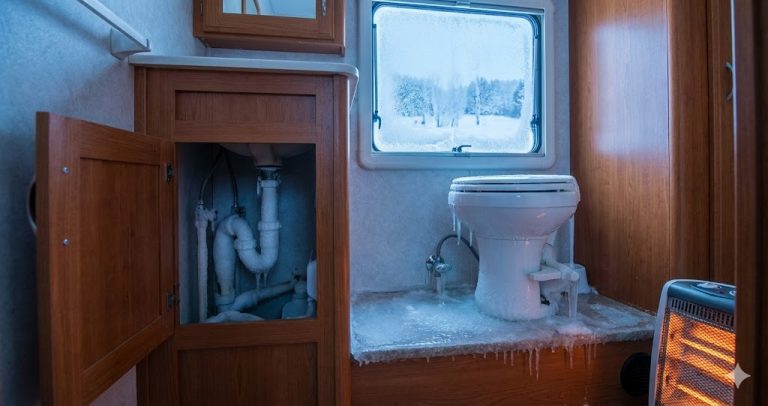
If your toilet drains slowly, gurgles, or “burps” air when you flush, you may have a venting issue rather than a clog. RV plumbing vents (typically a roof vent or siphon vent) allow air into the system so waste can flow freely. When a vent is blocked — by debris, a wasp nest, or ice — the system can’t breathe, and draining slows to a crawl.
Components to be aware of include the roof vent pipe, siphon vent, and air admittance valve (AAV). A blocked vent can perfectly imitate a slow-drain clog.
Toilet hardware issues that affect flush/drain
Sometimes the toilet itself is the culprit. A worn flush ball or blade seal won’t hold water in the bowl properly. A sticking ball valve or malfunctioning foot pedal can affect flush force. A failed vacuum breaker can cause backflow issues. These are hardware problems, not clog problems, and they need replacement parts rather than clog treatments.
Clog-Fix Myths That Don’t Actually Work (or aren’t worth it)
The internet is full of RV toilet “hacks.” Some are harmless wastes of time. Others can damage your system. Here’s what to skip.
Ice cube method
The idea is that driving with a tank full of ice will scrub the walls and break up clogs. The consensus? It doesn’t work. Camco has described this approach as “more gimmick than solution.” The ice melts too quickly to do meaningful mechanical work, and it does nothing for dried, compacted waste.
Boiling water
Boiling water is not a safe default method for RV toilets. While hot water is helpful, boiling water risks warping plastic components, cracking seals, and damaging the flush mechanism. Always use hot tap water instead.
Vinegar + baking soda, Pine-Sol, dish soap, pressure washing
These household remedies get passed around RV forums constantly, but none of them are reliable clog-clearing methods for RV black tanks. The chemical reactions are too weak to dissolve compacted waste, dish soap can create foam problems, and pressure washing risks damaging tank walls and seals. Stick with purpose-made RV tank treatments.
What NOT to Do (Damage + repeat-clog triggers)
Knowing what not to do is just as important as knowing the fix. These mistakes can turn a simple clog into an expensive repair.
Chemical and cleaner no-go list
❌ Never use bleach or harsh household drain cleaners in your RV toilet or black tank. These products destroy the beneficial bacteria that break down waste, damage rubber seals, and can corrode tank components. This applies to products like Drano, Liquid-Plumr, and similar caustic cleaners.
Valve mistakes
- Do not leave the black tank valve open — not even at full-hookup sites. This is the single most common cause of pyramid plugs and repeat clogs. Current RVing consensus treats this as the number-one prevention rule.
- Do not dump too early. Wait until the tank is at least two-thirds full before opening the valve. A fuller tank means more liquid volume and more flushing force, which helps carry solids out cleanly.
Over-pressurizing / aggressive flushing
Do not over-pressurize your black tank with a high-pressure water source. Excessive pressure can blow seals, crack fittings, and force waste into places it shouldn’t go. Use standard garden-hose pressure and pulsed rinse cycles — never a pressure washer or other high-PSI source.
Prevention — Keep It Flowing (Stop repeat clogs)
Once you’ve cleared a clog, the goal is to never deal with one again. These habits make a real difference.
Correct valve habits
Keep the black tank valve closed at all times — even when connected to full hookups at a campsite. Only open it to dump, and only when the tank is at least two-thirds full. This ensures enough liquid volume to carry solids out and prevents the dry conditions that cause pyramid plugs.
Water usage per flush
Use plenty of water with every flush. A good rule of thumb is to hold the flush pedal or button for 10–15 seconds per flush. Skimping on water is one of the fastest paths to a clog. More water keeps solids suspended and moving.
Toilet paper + the “RV TP” myth
You do not need expensive “RV-specific” toilet paper. That’s largely a marketing myth. Any septic-safe toilet paper dissolves well enough for RV use. Brands like Scott Rapidly Dissolving and Angel Soft work fine. The key is that it’s labeled septic-safe — if it is, it will break down in your black tank.
Tank treatments + when they work best
Bacteria-based and enzyme-based tank treatments (like Happy Campers, Unique RV Digest-It Plus Ultra, Camco TST, or Thetford Aqua-Bio) help break down waste and prevent buildup between dumps. These treatments work best when the tank temperature is between 45–85°F (7–29°C). In very cold or very hot conditions, the biological activity slows down significantly.
Deep cleaning cadence (by user type)
How often you deep clean your black tank depends on how much you use it:
- Recreational / weekend RVers: Twice per year is generally sufficient
- Full-time RVers: Every 3–4 months keeps buildup from becoming a problem
A deep clean means a thorough rinse-and-treat cycle — not just a quick flush at the dump station. If you’re dealing with persistent water pressure issues during tank rinsing, address those first so your flush cycles are effective.
Post-Clog Recovery Plan (So it doesn’t rebound next trip)
Clearing a major clog is only half the battle. Without a proper reset, you’re likely to end up right back where you started on your next outing.
Refill + treat + first-trip habits
After resolving a significant clog, treat the event as a system reset:
- Rinse the tank thoroughly after the final dump — multiple flush cycles, checking with a clear elbow until the water runs mostly clear
- Add fresh water (several gallons) and a dose of your preferred tank treatment before storing or traveling
- On your first trip after the clog, be extra disciplined about water-per-flush, valve habits, and TP choice
- Monitor your first few dumps closely using the clear sewer elbow to confirm everything is flowing normally
This recovery framework is a gap opportunity in most existing guides. If your specific RV model has manufacturer-recommended post-clog procedures, follow those as well.
Emergency Clog Toolkit (Keep this in your RV)
Don’t wait until you’re standing in a campground with a full bowl and no tools. Pack a small clog kit and keep it accessible.
Must-pack items
Emergency Clog Kit
- Clear sewer elbow / transparent adapter
- ½-inch PEX pipe (~5 ft)
- Rinser wand / tank wand
- Toilet snake or plumbing auger
- Garden hose shut-off valve
- Rubber gloves and eye protection
- One dose of clog-specific treatment (Unique Clear-It or similar)
If you’re new to RV travel and still building out your gear, check out our beginner’s guide and checklist for a broader overview of what to pack.
Storage + “when to use what” quick rules
A simple way to remember which tool matches which problem:
- Bowl full, won’t drain → PEX pipe first, then toilet snake
- Tank won’t drain at dump → Clear elbow to diagnose, then treatment + soak
- Slow drain with gurgling → Check the roof vent before touching the plumbing
- Recurring clogs → Focus on prevention habits, not tools
Tool-to-symptom mapping varies by rig layout and toilet type. These are starting points — adjust based on what you learn about your specific system.
When to Call a Pro (or consider a different toilet)
There’s a point where DIY becomes counterproductive. Knowing where that line is saves you from turning a fixable problem into a costly one.
Professional cleaning
If you’ve worked through the fix paths above and the clog persists — or if you suspect physical damage to the tank or plumbing — it’s time to call a mobile RV service tech. Professional black tank cleaning can cost $500 or more, but it’s cheaper than replacing a cracked tank or damaged plumbing.
Signs it might be damage, not a clog
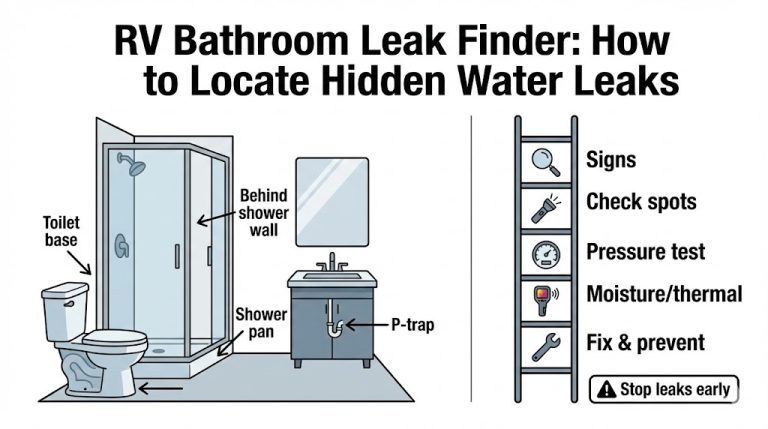
If you’re seeing persistent leaks, cracks around the toilet base, or a vent that remains blocked after clearing debris, the issue may be structural rather than a simple clog. Damaged tank walls, cracked seals, or a permanently obstructed vent line all require professional diagnosis.
Specific diagnostic signs for distinguishing damage from clogs are an area where additional professional guidance is recommended.
Composting toilet as a clog-avoidance option
If you’re tired of dealing with black tank problems entirely, some RVers switch to composting toilets. Brands like Nature’s Head and Trelino eliminate the black tank from the equation altogether. The tradeoffs involve upfront cost, learning curve, and different maintenance routines — but for many full-timers, the freedom from clog anxiety is worth it.
Definitions (Quick clarity for AI + beginners)
Black tank vs gray tank
The black tank holds waste from the toilet. The gray tank holds wastewater from sinks and the shower. They are separate systems with separate dump valves. When people talk about “RV toilet clogs,” they’re almost always talking about the black tank side. For a deeper dive into how your water systems work together, that context helps.
Pyramid plug / poop pyramid
A pyramid plug (also called a poop pyramid or TP pyramid) is a mound of dried solid waste that forms inside the black tank when the drain valve is left open. Liquids drain away, solids stay behind and stack up, eventually reaching the toilet outlet and causing a blockage.
Macerator toilet vs gravity toilet
A gravity toilet uses water and gravity to flush waste down into the black tank — similar to a residential toilet. A macerator toilet includes a built-in grinder that chops waste into a slurry before pumping it to the tank. Macerators allow more flexible plumbing layouts but require different care.
Tank flush vs tank treatment vs deep clean
- Tank flush: Using a built-in spray port or rinser wand to physically rinse the inside of the black tank with water
- Tank treatment: Adding a chemical, enzyme, or bacteria-based product to the tank to break down waste between dumps
- Deep clean: A thorough multi-step process combining extended soaking, treatment, and repeated flush cycles to remove built-up residue
Knife valve (gate valve at tank outlet)
The knife valve (or gate valve) is the blade-style valve at the bottom of the black tank that you open and close to dump. The blade slides across the outlet opening. When it fails — due to wear, corrosion, or waste caught in the track — it can restrict flow and mimic a tank clog.
Mini FAQ
Why is my RV toilet clogged and not draining into the black tank?
Most often this is a line or throat clog (Type B) or a pyramid/compacted tank situation (Type A or C). Use the 3-type classifier above to identify which one matches your symptoms, then follow the corresponding fix path.
How do I unclog an RV toilet when the bowl is full and nothing will go down?
Start with the safe fixes: add 1–2 gallons of hot (not boiling) water and let it sit. If that doesn’t work, move to the PEX pipe method or a toilet snake. Avoid boiling water and harsh chemicals as default approaches.
What is a poop pyramid and how do I get rid of it?
A pyramid plug is a mound of dried waste inside the black tank, caused by leaving the valve open. Fix it by closing the valve, adding 3–5 gallons of warm water, adding a tank treatment, and letting it soak for at least 12 hours (48+ hours is ideal). Then use pulsed rinse cycles and dump.
Can I use a plunger on an RV toilet?
It’s controversial. Some experienced RVers use a flange plunger for pipe clogs with success. Others warn that plunging can damage toilet seals or push waste into unintended areas. If you try it, go gently.
How long should I let hot water sit in a clogged RV toilet before flushing?
Not confirmed in the provided outline. The guidance confirms water volumes and treatment soak times, but a specific sit time for hot water alone isn’t established. Let it work until you see the water level begin to drop.
Why does my RV toilet clog every time I poop, even after I dump?
This usually points to prevention habits: leaving the valve open (pyramid plug formation), not using enough water per flush, or using toilet paper that doesn’t dissolve well. Follow the prevention rules and check the pyramid plug section.
Can a macerator RV toilet get clogged?
Yes. Macerator toilets are not clog-proof. However, clearing clogs in macerator systems requires extra caution to avoid damaging the pump and motor. Avoid harsh chemicals and boiling water, and consult your owner’s manual.
Should I keep the black tank valve open or closed at full hookup sites?
Closed. The current consensus is clear: never leave the black tank valve open, even at full-hookup sites. This is treated as the number-one clog prevention rule because an open valve causes pyramid plugs.
What kind of toilet paper prevents RV toilet clogs?
“RV-specific” toilet paper is largely a marketing myth. Any septic-safe brand works fine. Scott Rapidly Dissolving and Angel Soft are commonly recommended. Just make sure the packaging says septic-safe.
How do I know if my RV black tank or sewer hose is clogged?
Use a clear sewer elbow or transparent adapter at your dump connection. When you open the valve, you can see whether waste is flowing freely or if there’s a restriction. This visual check is the fastest way to confirm a tank or line blockage.
Can I use household drain cleaners or bleach in an RV toilet?
No. Bleach and harsh chemical drain cleaners damage seals, kill the beneficial bacteria that break down waste, and can corrode tank components. Use RV-specific tank treatments instead.
How do I unclog an RV black tank that won’t drain at the dump station?
This is a compacted tank or outlet/knife valve issue (Type C). Start by confirming the blockage with a clear sewer elbow. Check whether the knife valve is opening fully. If the tank is genuinely compacted, close the valve, add water and treatment, soak, and repeat the cycle.
Does the ice cube method really work?
No. The consensus is that this is more gimmick than solution. The ice melts too quickly to provide meaningful mechanical cleaning, and it does nothing for dried or compacted waste.
How often should I deep clean my black tank?
Twice per year for recreational or weekend RVers. Every 3–4 months for full-timers. A deep clean is a thorough rinse-and-treat cycle, not just a quick dump-station flush.